One of the things that is intimidating for a lot of Word users, is adding page numbers to documents when the first or second page is not to be numbered, or should be numbered with a different format, eg. i, ii, iii, and then 1, 2,3, in the second section etc. Microsoft still hasn’t made it any easier to do this kind of standard numbering; but nonetheless, it can be done.
To add standard page numbers to your documents, all you need to do is click anywhere on the first page, click the Insert tab on the main ribbon, click Page Number, then scroll through the many examples that Microsoft has provided and pick one. This is the easy stuff.
What’s not so easy is if you have a document that has a title page that is not supposed to have any numbers on it, then some introductory pages that are supposed to be number with lowercase Roman numbers, and then regular numbers starting at 1, for the rest of the document.
Of course, you could just create two or three documents and number them (or not at all if you choose) differently then each other, then print them out or send them as separate documents. But this is clunky and you should be able to make Word do what you want, right? Well, you can, but it takes some extra effort. They key to the whole thing lies with the Next Page – Section Break. This is because Word treats sections independently when assigning page numbering.
Therefore, if you have a document where you want the cover page to have no numbering, and then some descriptor pages with special numbering, and then the body of the document to have regular numbering starting with “1”, you need to divide your document into three sections.
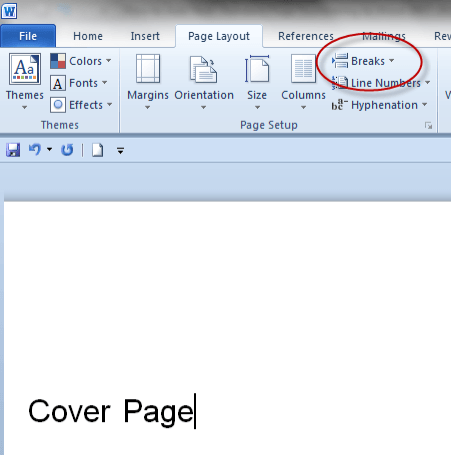
To do this, start Word with a blank document, type the word “Cover Page” on it, then click the Page Layout tab on the main ribbon.
Click where it says Breaks:
A dropdown menu will appear; click Next Page, under Section Breaks:

This will cause a section break to be inserted into your document and a new page to begin under it.
Type the words “Middle Section” then press the Enter key multiple times until you run past the end of page 2 and start on page 3. Type the words “Second Page of Middle Section.” Then, click on Breaks again, and once again click Next Page under Section Breaks; just as you did to create the prior section.
You should now be on page four of your document. Type the words, “Body of my Document” and then press the Enter key a bunch of times again until you create yet another page. Then type the words, “Second Page of Document Body”.
Your document should now be five pages long and be comprised of three sections.
Now, to add the page numbers; the first section is set for now, since it will have no page number. Instead, move down to the first page of the second section, which is the page with the words “Middle Section” on it. Click anywhere in the words , then click the Insert tab on the ribbon. Then click on the Page Number icon:
![]()
Choose whichever preformatted style you’d like for your page numbers (in our example, we use Bottom of Page – Plain Number 2) to insert your page numbers; once you’ve clicked on your choice, the page numbers will be inserted and you’ll be put in the Header & Footer Tools tab. Once again click once again on the Page Numbers icon (though on this ribbon, it’s moved over to the left side).

Click Format Page Numbers on the drop-down menu, and then use the down arrow to choose lowercase Roman numerals for the Number Format:

Then click the Ok button to make the changes, and then click on the Close Header and Footer icon on the far right-hand side of the ribbon, to get back to your document.

Then, to insert the regular numbers in the third section move down to the page that says “Body of my Document” and once again click on the Page Numbers icon, insert your page numbers just as you did in the second section and then once they are inserted, once again click on the Page Numbers icon and then choose the Page Format menu choice again, only this time, instead of changing the Number format to Roman numerals, click the bullet that says Start at: and then type in the number “1” like this:

Click the Ok button, and then the Close Header and Footer icon again to get back to your document once more.
With that, we’re almost done.
There are still two problems, the cover page is showing a page number and the Roman numerals are starting at ii, instead of i.
To fix the first problem, go to the first page of your document and then click Insert and then Page Numbers again, and then once again insert the same page number format as you did the first time, but this time, after you do so, note where it says “Different First Page” on the ribbon; click the check box to suppress numbering the first page in your section.

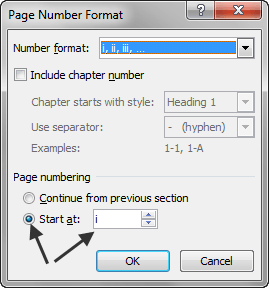
To fix the numbering problem with the Roman numerals in the second section, go to the page in your document that says “Middle Section” then click once again on the Insert tab, then once again choose Page Number to get the drop-down box, then choose Format Page Numbers from the menu to get the Page Number Format window. This time, click the Start at: bullet again, and type in a “1”; it will be automatically converted to the Roman numeral i.
And finally, click the Ok button, and then the Close Header and Footer icon again to get back to your document.
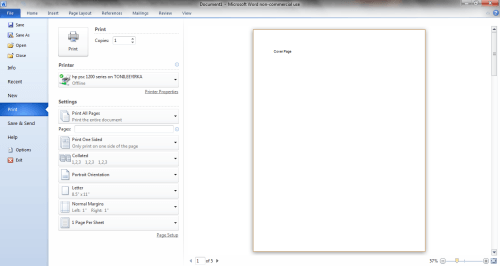
And that should do it; to see the results of your efforts, click on File on the main ribbon to get to the Backstage area, then choose Print to get a preview of your work.
The methods described here can be used to number your pages in Word any way you like.

No comments:
Post a Comment