Windows Messenger Plus! Live is a free extension that adds extra features such as skins, log search, custom emotion sounds and tabbed chatting to Windows Live Messenger.
To use Windows Messenger Plus! Live, you must install Windows Live Essentials, which requires Windows XP, Windows Vista SP 2 or Windows 7 to run. Windows Live Essentials for Windows XP is a separate version.
Your computer must have a 1.6 GHz processor, 1 GB of memory and a graphics processor that supports DirectX 9 and Shader Model 2 and a resolution of at least 1024 by 576 pixels. Some features of Windows Live Messenger have additional hardware requirements.
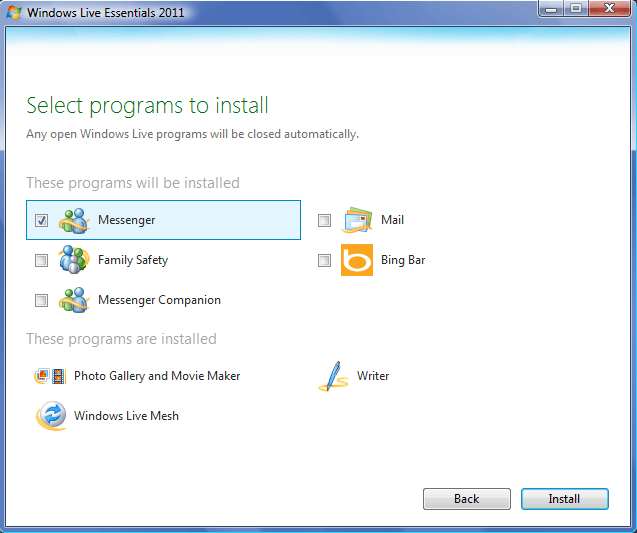
Log onto your computer as an administrator. Navigate to the Microsoft website and run the Windows Live Essentials installer. Select Choose the programs you want to install. Select Messenger. If you’d like to share web pages with your friends while surfing in Internet Explorer, select Messenger Companion as well.
Otherwise, you can leave this box unchecked. Uncheck the boxes beside any other Windows Live Essentials programs you don’t want to use. Click Install. After the Windows Live Messenger software downloads and installs, select Restart Now.
Download and run the Windows Messenger Plus! Live plugin. Select your language and click Next. Select the check boxes in the next window if you want to install the Windows Messenger Plus! Live toolbar and use the Messenger Plus! search engine as your default web search and homepage. Click Next. After reading the license terms, click the check box to accept them, then click Next again.

Make sure that Windows Live Messenger is closed when you install Messenger Plus! Live. After you install Messenger Plus! Live, a configuration wizard will launch. Use it to set your preferences, then start Windows Live Messenger.
Skins
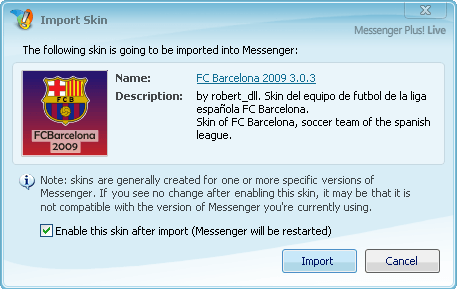
Navigate to the Messenger Plus! Live Skins database. Browse through the list to find the skin you like. Make sure to check the compatibility section to see if the skin is compatible with your version of Windows Live Messenger.
Click on the thumbnail to see more information, then click Download. After the download completes, click Open. In the Import Skin dialog box, click Import. In Windows Live Messenger, click the Messenger Plus! Live icon, then select Messenger Skin and Select a Different Skin.
Chat Log Search
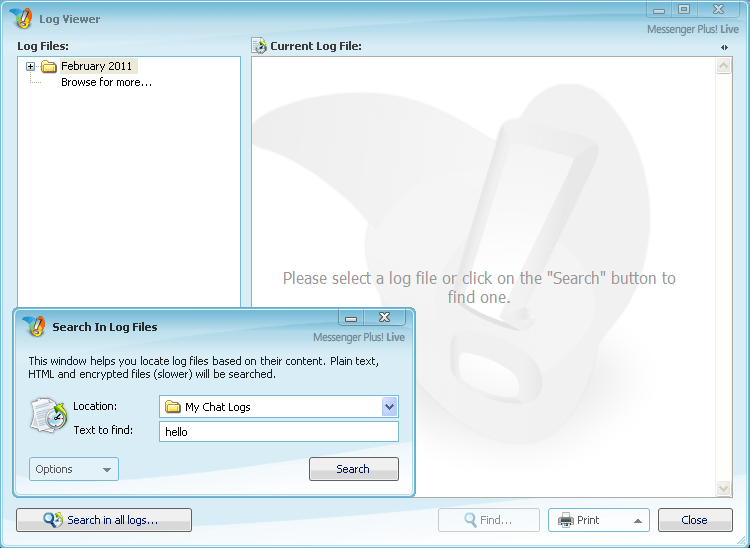
Select the Windows Live Messenger Show Menu icon, then mouse over Plus! Select Chat Log Viewer. Choose Search in All Logs. Type the text you’d like to find in the Text to find box, then click Search. The results will appear in a window below the search field.
Chat Colors, Text Formatting and Emotion Sounds
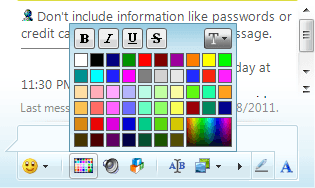
To change the color or format of your chat text or background, press the multicolored button below the chat window. When you select a color or a text format style, Messenger Plus! will insert code in the window. Simply type your text where the blinking cursor is located. Be careful not to move the cursor, or your text won’t send properly.
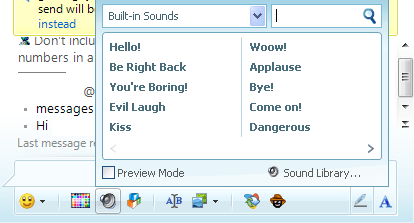
Emotion Sounds
To send a sound, click the speaker icon. You can select from the Built-In Sounds or choose from another list, such as Cartoons and Games, TV and Movies, Music, Vocals, and Sound Effects.
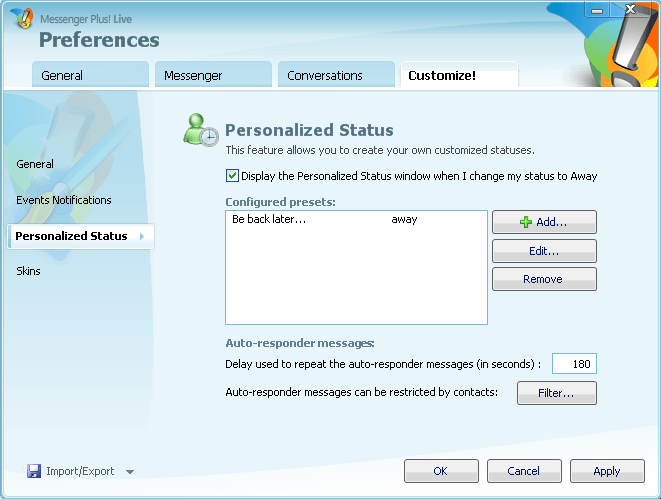
Personalized Status
To set your personalized status, select the Messenger Plus! icon and then Preferences and Options. Click the Customize tab, then select Personalized Status. Click the Add button.
Type your personalized away status in the fields marked Status Name, Name tag, Personal Message and Auto-responder. Select your chosen status from the drop-down menu. Choose your Automatic reset time and activate a global shortcut, if desired. Click OK twice to save your changes.
To learn more about this topic, read Prevent Windows Live Messenger from Automatically Loading when Windows Starts.

No comments:
Post a Comment