Welcome to the second part of this two-part series about using File Shredder to securely delete files and securely wipe the free space on your hard drive(s).
In Part I, we covered installing File Shredder, shredding files in File Shredder, and changing settings in File Shredder.
In this post, we are going to discuss shredding files using the context menu in Windows Explorer and securely wiping the free space on your hard drive(s).
Make sure you have downloaded and installed File Shredder prior to following the steps in this post. Also, we recommend you go through the steps in Part I before proceeding with the post.
Download File Shredder from
Shred Files Using the Context Menu in Windows Explorer
If you turned on the Enable Shell Integration (Right Click) option on the Program Settings tab on the Settings dialog box, you can shred a file using the context menu in Windows Explorer.
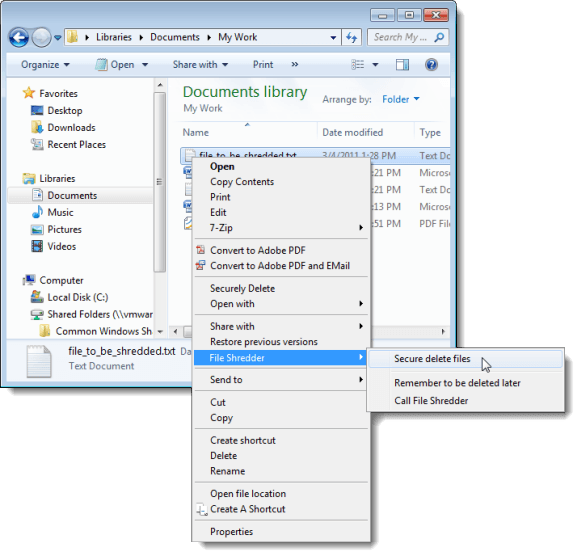
Open Windows Explorer and navigate to the file(s) you want to shred. Select the file or multiple files. Right-click on the file(s) and select File Shredder | Secure delete files from the popup context menu.
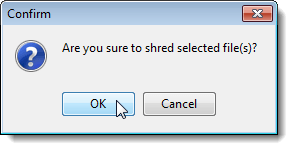
A Confirm dialog box displays to make sure you want to shred the selected file(s). Click OK to shred the file(s).
NOTE: Remember, the files you shred will be permanently deleted and will not be recoverable.
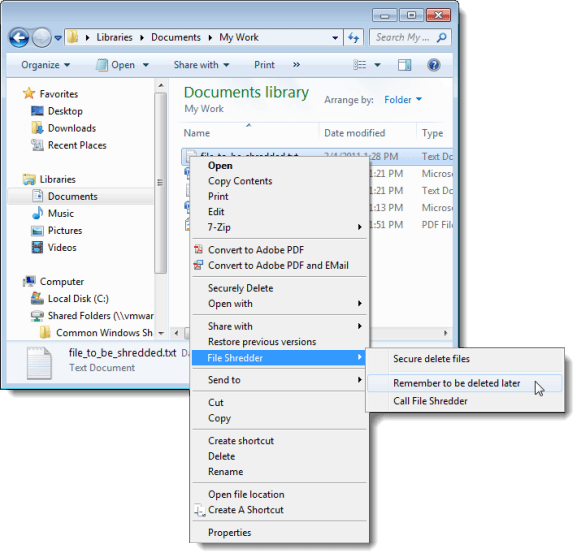
You can also add files to the list in File Shredder to be shredded at a later time using the context menu. This allows you to easily add multiple files from multiple locations to File Shredder and then shred them all at once. To do this, select one or more files in a folder, right-click on the file(s), and select File Shredder | Remember to be deleted later from the popup context menu.
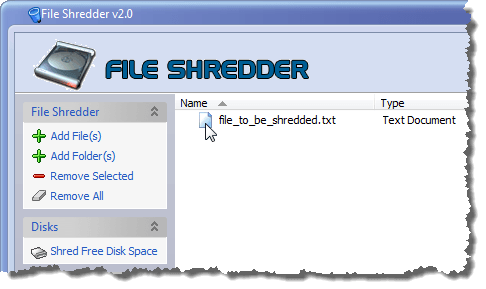
To open File Shredder from within Windows Explorer, right-click on any file and select File Shredder | Call File Shredder from the popup context menu. Any files you added to File Shredder using the Remember to be deleted later option on the context menu display in the list of files in File Shredder. To shred the files added to File Shredder, click the Shred Files Now button, as discussed earlier.
Securely Wipe the Free Space on Your Hard Drive
You can also use File Shredder to shred the free disk space across your whole hard drive. This option is very useful if you have used the regular Windows Delete command in the past to delete your files.
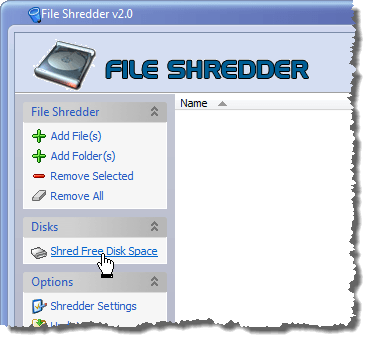
It will make your previously deleted files irretrievable by shredding everything you have deleted using the regular Windows Delete command, whether is was yesterday or months ago. To use this tool, open File Shredder, if it is not already open. Click the Shred Free Disk Space link in the left pane.
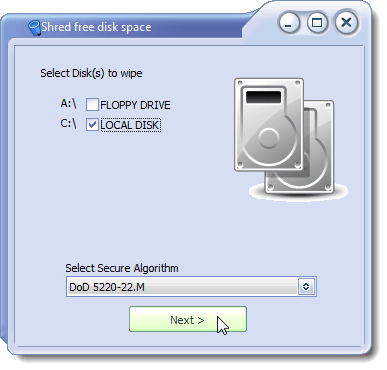
The Shred free disk space dialog box displays. Select the check box(es) for the drive(s) for which you want to wipe the free space. Select the desired secure algorithm from the Select Secure Algorithm drop-down list (the options were described earlier in this post). Click Next.
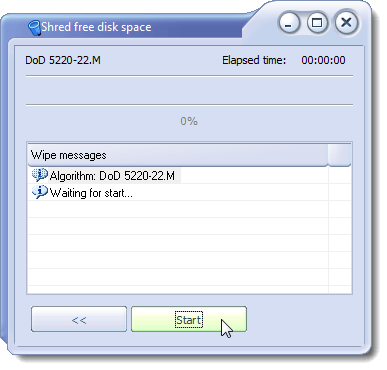
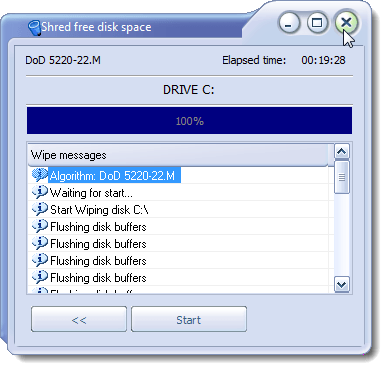
A progress screen displays with a message saying telling you the program is waiting to start. Click Start to begin the wiping process.
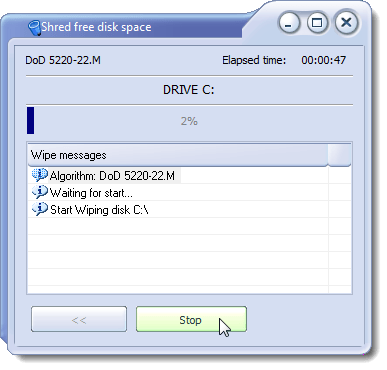
The progress of the wiping progress displays and the status is reported under Wipe messages.
When the wipe process is finished, the progress bar reads 100%. To close the Shred free disk space window, click the X button in the upper, right corner of the window.
Wrap Up
In this post, we covered shredding files using the context menu in Windows Explorer and securely wiping the free space on your hard drive(s).
In Part I of this series, we covered installing File Shredder, shredding files in File Shredder, and changing settings in File Shredder.
This series was meant to provide you with a fast, easy, and reliable tool for securely deleting, or “shredding,” your files. File Shredder seems to be a good free option on par with other commercial options for file shredding.
It is free to use, without any restrictions, under the GNU license. We found it very useful for the permanent and safe removal of confidential documents, whether they be personal or business documents.

No comments:
Post a Comment