Tips & Tricks, Tutorials, Hacking, Troubleshooting,

Showing posts with label Mac OS X. Show all posts

If you like using a mouse to get work done on your Mac or Windows laptop, then you might find it useful to disable the trackpad or touchpad on your system. This is really useful if you type a lot and the trackpad is located in a spot on your laptop that causes it to always pick up slight movements from your hand while typing.
It can be really annoying if you are typing something and all of a sudden the cursor jumps to another part of the document! In this article, I’ll show you the different ways to disable the touchpad on OS X, Windows 7 and Windows 8.

Disable Trackpad OS X Mountain Lion

If you’re running the latest version of OS X and you have a bluetooth or USB mouse connected, you can have OS X ignore the trackpad by going to System Preferences and then clicking on Accessibility.
disable trackpad mac
Then scroll down to Mouse and Trackpad and check the Ignore built-in trackpad when mouse or wireless trackpad is present box.
mouse and trackpad

Disable Trackpad on Windows

In Windows 7 and Windows 8, there are a couple of different ways you can disable the trackpad depending on how your system is configured. The first way you want to check is to see if there is a special button on the keyboard or switch on your laptop to disable the trackpad. For example, this is the key on a Dell laptop. You have to press the Function key and the trackpad button to enable/disable it.
disable trackpad keyboard
If you don’t have the button or the switch, the next way to disable the touchpad is to go to Mouse properties from Control Panel and check if there is a Device Settings or Touchpad tab.
device settings
Click on the Disable button and you’re good to go. If you don’t see the Device Settings tab in Mouse Properties, that means you don’t have the proper drivers installed or the full software for the trackpad. Go to the manufacturers website and download the full driver package.
Lastly, you can open up Device Manager from Control Panel, expand Mouse and other pointing devices and then disable the touchpad if it is listed there.
uninstall touchpad
Everything is the same when disabling the trackpad in Windows 8 also. Of course in Windows 8, your trackpad may not even work unless you have the latest drivers! Synaptics still hasn’t released a Windows 8 generic Touchpad driver yet, so keep an eye out for that if you have a Synaptics touchpad on your laptop. Enjoy!

I love my iPhone and I also like iCloud, but what I hate is that I have a ton of duplicate contacts! Why is that? Well, it’s because I use the same iCloud account on multiple iPhones and iPads. All the contacts from my wife’s iPhone and my sister’s have been merged into on giant list and there were a bunch of duplicates.
The other annoying thing was that the duplicates were slightly different. For example, I had a contact Vineet and then another one called Vineet R and another called Vineet Rohatgi! One had a number, one had an email and the last one had an address. So not exact duplicates, but still all the same contact info.
In this article, I’ll go through a couple of ways you can solve the problem of duplicate contacts and how to merge them together. In terms of solutions, I found a lot where you could delete exact duplicates, but it took a little bit longer to find a way to merge contacts that might have different names, but had identical phone numbers or email addresses.

Method 1 – Mac Address Book

If you have a Mac and have your address book setup to sync with iCloud, you can use it to remove exact duplicates. The Address Book app on the Mac will not do any kind of merging on it’s own, it will only find contacts with the exact same name and then merge those two together.
Open your Address Book and then click on All Contacts under iCloud. You should see all your iCloud contacts on the right hand side.
remove duplicates
Next, click on Card and then Look for duplicates.
look for duplicates
If the Address Book finds any duplicates, it will ask you if you want to merge them together. If it doesn’t find any duplicates it’s because there were not contacts with the exact same name. Remember, it won’t look at any other field like phone number or email address. It’s a simple duplicate finder and useful if you happen to have a lot of contacts that are identical copies.

Method 2 – Smart Merge App

The second method and by far the more useful way to remove duplicated contacts is to use an app that you can download to your iPhone called Smart Merge Duplicate Contacts
. It’s 99 cents, but it’s totally worth the money. It saved me a ton of time by finding all possible contacts that could be merged and then letting me edit any specific details for the new merged contact. The app can basically show you duplicate contacts (same name), duplicate phone numbers, duplicate email addresses, contacts with no name, contacts with no phone number and contacts with no email. Here’s what it looks like when you first run it:
duplicates
If you tap on Duplicate Phones, for example, you’ll see a list of contacts grouped by the same phone number.
same phone number
Then tap of any set of duplicates. Don’t tap on the “All Duplicate Phones” because that will merge all of your duplicates into one contact, which you don’t want to do. You want to work with just the pairs that are duplicated. For example, I clicked on the first one above starting with 469 as the number.
merge contacts
Now you have to tap on the Merge button, which is the arrow pointing down at the bottom center of the screen. You’ll get a popup screen asking you how you want to merge:
merge a contact
You can either edit them at the same time or Force Merge the contacts. I personally have found that force merging is better. Go ahead and tap on that button. You’ll then get another warning that doing so will convert 2 contacts into one.
force merge
Go ahead and tap on the Force Merge 2 Contacts button.
merge
Now you’ll see another screen with a big empty circle on the far left and a blue arrow on the far right. Before we do the merge, we’ll check the final contact to make sure it’s correct. Go ahead and tap the blue arrow.
new contact
Now you can see what information is inside the two separate contacts and how the new merged contact will look. The only problem I have found with the app so far is that it likes to automatically choose the contact with the shorter name. So as you can see above, instead of choosing Anurag Bhushan as the new contact, it chose Anurag. Everything gets merged just fine. To fix this issue, you have to tap on the new contact and then you’ll see an Edit button at the top right.
edit contact
Go ahead and fix the name or whatever else you want and then go back. Go back to the Merge screen and then tap the empty circle to make it into a red checkmark.
force merge
Finally, click on the Merge button and it will create the new contact and delete the older ones! It’s quite a few steps, but it’s a lot easier than manually trying to do all that stuff on your own. Plus, once you do it once or twice, it’s really fast after that. I was able to remove over 60 duplicate contacts using this nifty little app. What method have you used to remove duplicates or merge contacts on your iPhone? Let us know in the comments. Enjoy!

So I have a few Macs and a few PCs in my house and it’s always fun trying to get everything to communicate with each other. Luckily, with OS X Snow Leopard/Lion and Windows XP/7, communication between the different platforms is pretty good. Earlier is used to be a royal pain to get the two to talk, but now file sharing and printer sharing is pretty straightforward.
For example, I have a printer attached to my Windows 7 computer in my home office and I wanted to be able to print to it from my MacBook Pro running Lion. I thought it was going to take a long time, but luckily it didn’t! In this post, I’ll walk you through the steps to share a printer from Windows XP or Windows 7 to your Mac.
Note that the part about adding the printer to your Mac is the same regardless of whether it’s from Windows XP or Windows 7. The only difference is the way your share the printer in XP and 7.

Share Windows XP Printer

The first thing that needs to be done is the share the printer. In Windows XP, you can do this by going to Control Panel and clicking on Printers and Faxes.
Xp printers and faxes
Next, right-cick on the printer and choose Properties.
Xp properties
Finally, click on the Sharing tab and choose Share this printer.
Xp share printer
It’s probably a good idea to keep the name of the printer short (less than 8 characters) and also not to include any spaces or special characters. Just keep it to letters and numbers. Click OK and you’re done. Now skip down to the adding printer to your Mac section for the rest of the instructions.

Share Windows 7 Printer

In Windows 7, the process of sharing a printer is slightly different. First, go to Control Panel and click on Devices and Printers.
Devices and printers
Next, right-click on the printer and choose Printer Properties. In XP, you had to choose just Properties.
Printer properties
Finally, go to the Sharing tab and check Share this printer. That’s it for the Windows part!
Share printer

Add Windows Printer to OS X

Now for the final part. In OS X, go to System Preferences and click on Print & Scan.
print and scan
Now click on the little + button at the bottom of the box that shows you the currently installed printers.
add printer
Now you’ll get a pop up dialog that has a few options across the top. In our case, we want to click on Windows. This will automatically find all the Windows computers on your network! Sweet!
add windows printer
Click on the name of the computer with the shared printer and you’ll be asked to connect to it as a guest or registered user. In my experience, I was only able to connect as a registered user and only to Windows computers that had a username AND password. If you don’t have a password on your Windows user account, you won’t be able to connect and therefore won’t be able to see the shared printers. I can’t figure out a way to get it to work without having a password on the Windows account.
2012 05 17 19 01 42
Now you’l see the last box on the right will have the name of the shared printer(s).
shared printer
Click on the printer and then at the bottom you have to choose how to print. You have an option for Generic Postscript or Generic PCL, but normally you’re going to want to choose Select Printer Software. By default, OS X has a lot of drivers for the most common printers.
printer driver
They even had my Lexmark 7600 printer in the list, meaning I didn’t have to worry about downloading the latest Mac driver for my printer and installing that.
printer software
And that’s about it. The software will be installed and you should be able to print. If your printer is not in the list, then you had to choose Other in the drop down and then choose the driver manually. You’ll have to download the latest Mac driver for your printer in order to do that.
Having trouble connecting to the shared printer on your Windows machine? If so, post a comment here and tell us where your process failed. Enjoy!

Looking for an easy way to take screenshots, screen captures, or even screen record with Mac OS X? There are some convenient built-in Mac OS X tools, as well as some free downloadable software, that make screenshots in Mac OS X Snow Leopard easier than ever.

To get daily tips on Apple related products, such as Macs, iPhone, iPad, etc, check out our sister site Switching To Mac.

Screenshots

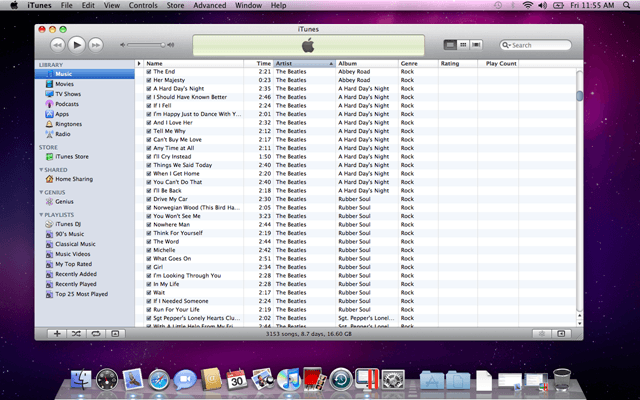
Screenshots are basically a picture of the entire screen, or the entire desktop. Screenshots work by taking a shot of everything exactly how it is arranged, with active windows open and everything. For example, if you have Safari and iTunes open, but iTunes is active and Safari is minimized, a screenshot will take a screenshot of your Mac OS X desktop just how it is.

Screenshots = COMMAND, SHIFT, 3 at the same time.

Alternatively, if you use = COMMAND, CONTROL, SHIFT, 3 at the same time, Mac OS X will snap a screenshot and copy it to the clipboard, rather than save it to the desktop.

Screen shot 2010-04-30 at 11.55.07 AM

Screen Captures and Snippets

Screen captures and snippets are similar to screenshots in the fact that they take a photo of the active windows/desktop. However, they are also different because they allow you to specify a certain region or portion of the screen. Screen captures and snippets is basically the Mac OS X equivalent of the Windows 7 Sniping Tool, for Windows users.

Screen Captures and Snippets = COMMAND,SHIFT,4 at the same time. From there, drag to select the section of the screen to capture.

Alternatively, if you use = COMMAND, CONTROL, SHIFT, 4 at the same time, Mac OS X will copy the snippet to the clipboard rather than save it as an image to the desktop.

Additional Mac OS X screenshot shortcuts:

COMMAND, SHIFT, 4, SPACE, CLICK A WINDOW = Take a screenshot of an individual window, and save it to the desktop.

COMMAND, CONTROL, SHIFT, 4, SPACE, CLICK A WINDOW = Take a screenshot of an individual window, and copy it to the clipboard.

Screen Recording

In some circumstances, you may want to do a screen recording rather than capture still frames with a snapshot. For example, screen recordings are highly popular for video tutorials. In Mac OS X, screen recording is actually quite easy. No software downloads required.

  • Navigate the path Finder > Applications > QuickTime Player.
  • Double click the QuickTime Player icon to launch QuickTime Player.
  • With QuickTime active, select File > New Screen Recording.
  • Click the red record button on the Screen Recording tool.
Read over the general guidelines and click the Start Recording button. To to stop recording, click the Stop Recording icon in the menu bar. OR Press COMMAND, CONTROL, ESC.