Extensions are very useful for adding more features to Firefox, and many people tend to install many extensions. You may lose track of the extensions you have installed and how many you have installed. If you need to install a fresh copy of Firefox on another computer, or reinstall Firefox on your current computer, it would be helpful to have a list of the extensions you use.
There are two Firefox extensions that produce a list of extensions installed in Firefox, Extension List Dumper and InfoLister.
Extension List Dumper
Extension List Dumper adds a Dump List option to the Add-ons window in Firefox, allowing you to save a list of all installed extensions to text, HTML, or CSV format. You can then print that list.
Install Extension List Dumper from
https://addons.mozilla.org/en-US/firefox/addon/3746.
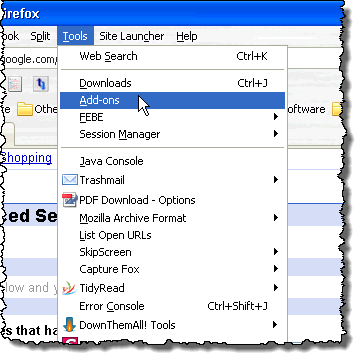
To generate a list of installed extensions, select Add-ons from the Tools menu.
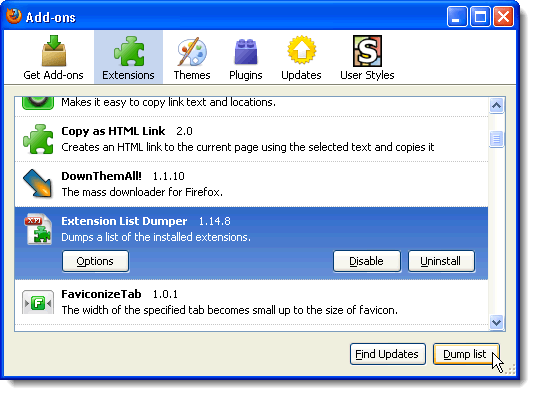
Click the Dump List button that was added to the Add-ons dialog box in the lower, right corner.
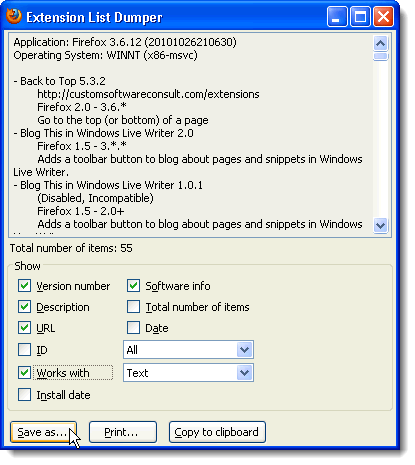
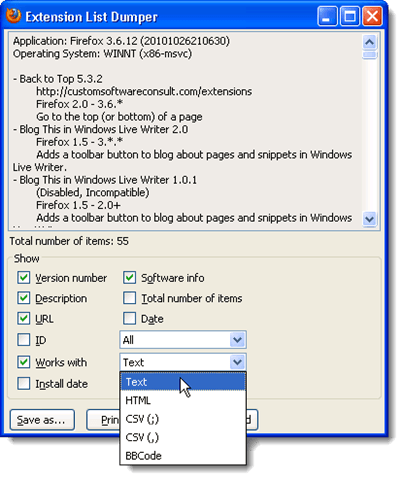
The Extension List Dumper dialog box displays. Select which items to display in the list for each extension by selecting the desired check boxes in the Show box.
Choose whether to display All the extensions, only the Enabled extensions, only the Incompatible extensions, or only the Disabled extensions from the first drop-down list.
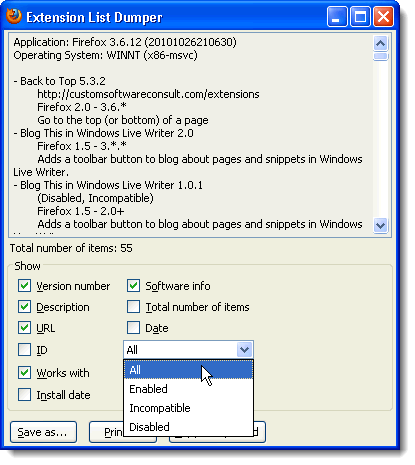
Select the type of format for the generated file from the second drop-down list.
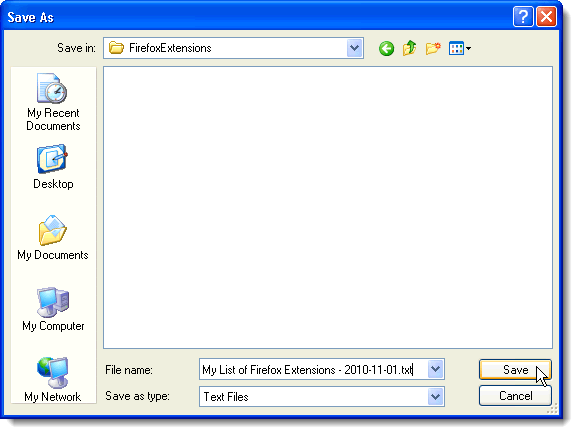
Click the Save as button on the Extension List Dumper dialog box. On the Save As dialog box, navigate to the location where you want to save your list of extensions. Enter a name for the file in the File name edit box and click Save.
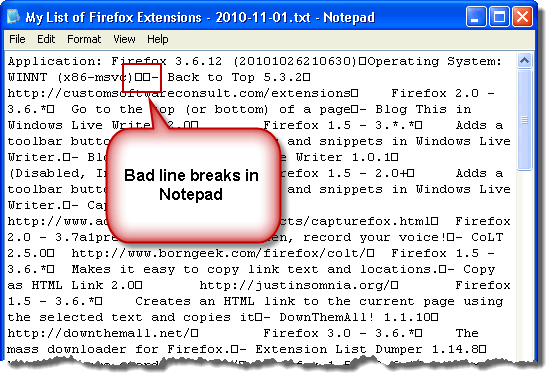
If you save the list of extensions as a text file, and you open up your saved file in Notepad, the line breaks may not display correctly and the text may run together.
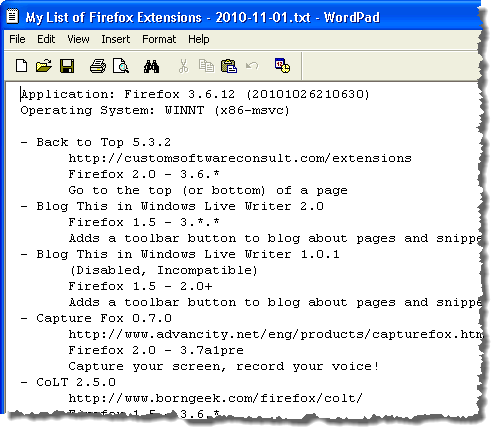
If that happens, open the text file in WordPad and it should display correctly.
To close the Extension List Dumper dialog box, click the X button in the upper, right corner of the dialog box.
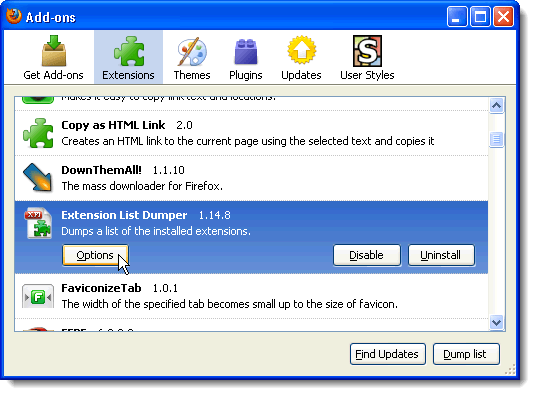
To set options for Extension List Dumper, open the Add-ons dialog box from the Tools menu, as mentioned earlier. Scroll down until you find the Extension List Dumper extension. Select it and click the Options button.
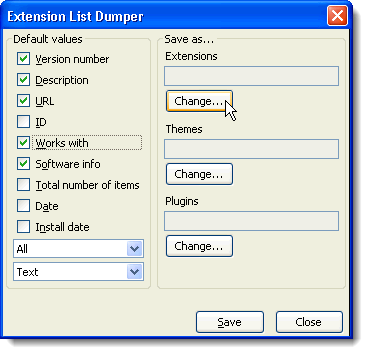
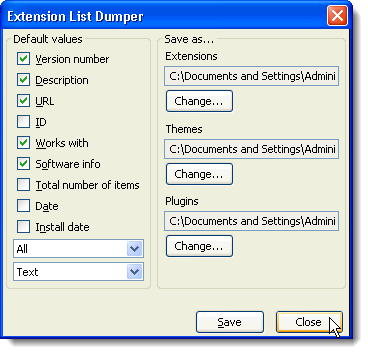
The Extension List Dumper options dialog box displays. The Default values box contains the same options available on the main Extension List Dumper dialog box. Selecting options in this box will cause these options to be selected by default each time you open Extension List Dumper. The Change buttons in the Save as box allow you to specify default paths, including filenames, for the files generated by Extension List Dumper.
NOTE: These default paths are just initial suggestions. If you set these, you can still change the location and filename when you save the list of extensions, themes, or plugins.
You cannot specify the paths and filenames manually in the boxes. You must use the Change buttons. Click the Change button under the Extensions box.
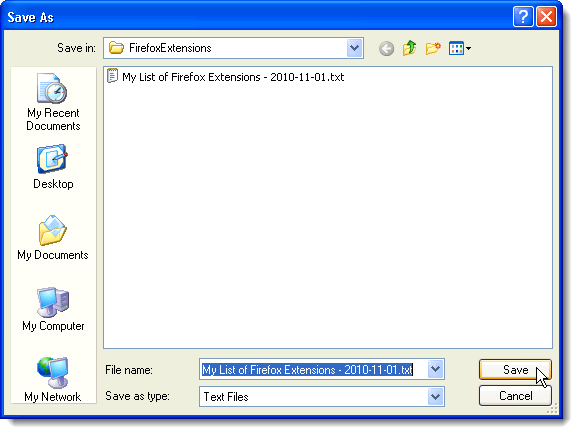
The Save As dialog box displays. Navigate to the location you want to use as a default location for your generated lists of extensions. Enter a default filename in the File name edit box and click Save.
Use the other Change buttons, as desired, to select default locations and filenames for the lists of Themes and Plugins. Click Close when you have finished setting your options.
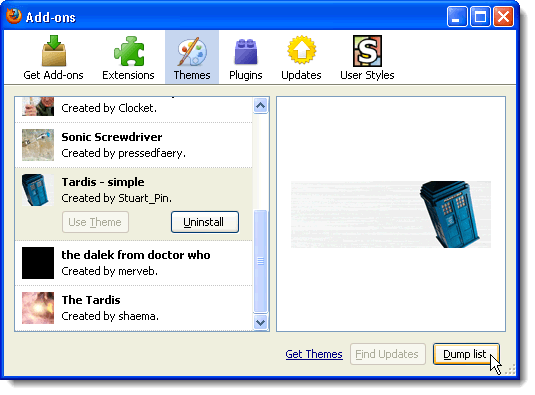
To generate a list of installed themes, click the Themes button at the top of the Add-ons dialog box and click the Dump list button. The process for selecting options and saving the file is the same as for extensions. You can do the same thing for your installed plugins on the Plugins screen.
To close the Add-ons dialog box, click the X button in the upper, right corner of the dialog box.
If you save the list of extensions in HTML format using Extension List Dumper, links to the home pages for the extensions are added, when available.
InfoLister
InfoLister adds an option to the Tools menu and allows you to save and print a list of extensions just like Extension List Dumper. However, there are not as many options available in InfoLister.
Also, the extensions, themes, and plugins are all included in the same list. InfoLister has a couple of features missing from Extension List Dumper. InfoLister allows you to upload your list to a website and you can also add a button for InfoLister to the toolbar in Firefox.
Install InfoLister from
https://addons.mozilla.org/en-US/firefox/addon/447.
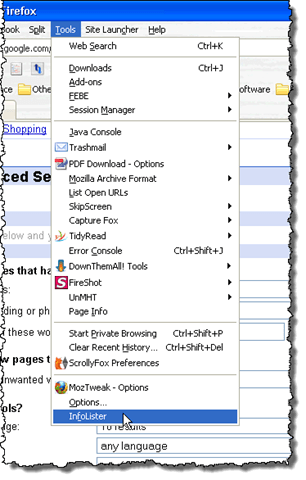
To generate a list of installed extensions, themes, and plugins, select InfoLister from the Tools menu.
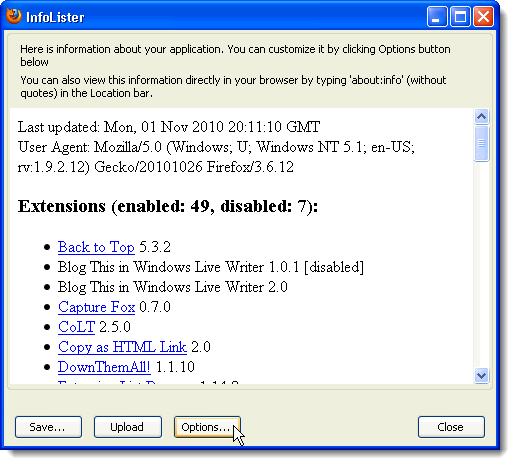
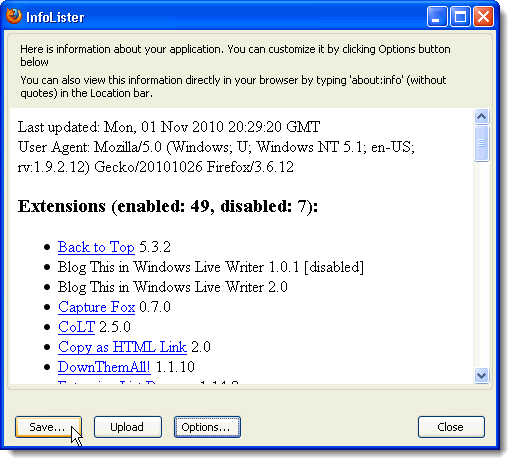
The InfoLister dialog box displays. First, we will explore the options available for InfoLister. Click the Options button.
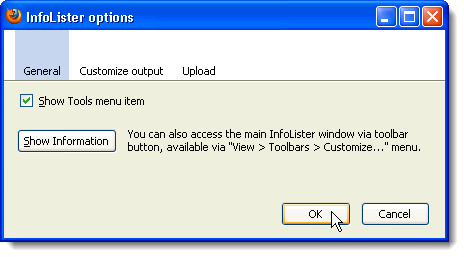
The General screen on the InfoLister options dialog box displays. If you don’t want the InfoLister option to display on the Tools menu select the Show Tools menu item check box so there is a check mark in the box. The Show Information button opens or activates the main InfoLister dialog box. There is also a tip listed for adding the InfoLister button to the toolbar. We will discuss how to do this later in this post.
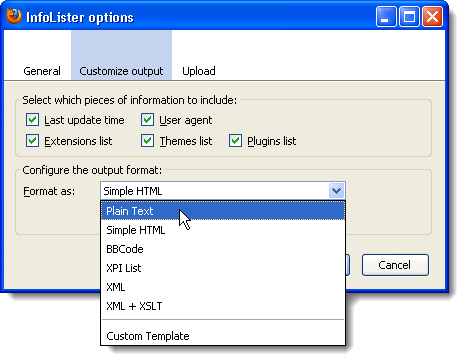
Click Customize Input at the top of the InfoLister options dialog box. The check boxes in the Select which pieces of information to include allow you to include and exclude parts in the generated list. Select the format for the generated file from the Format as drop-down list.
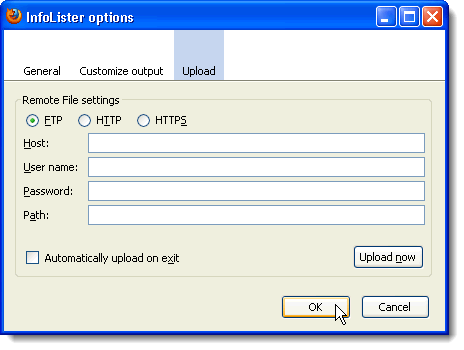
The Upload screen allows you to enter information necessary to upload your list to a website using the Upload button on the main InfoLister dialog box. If you always want to upload your list, you can do so automatically when you close InfoLister by selecting the Automatically upload on exit. You can also select to Upload your list immediately on the Upload screen, once you have entered the necessary information, by clicking the Upload now button.
To save your list, click the Save button.
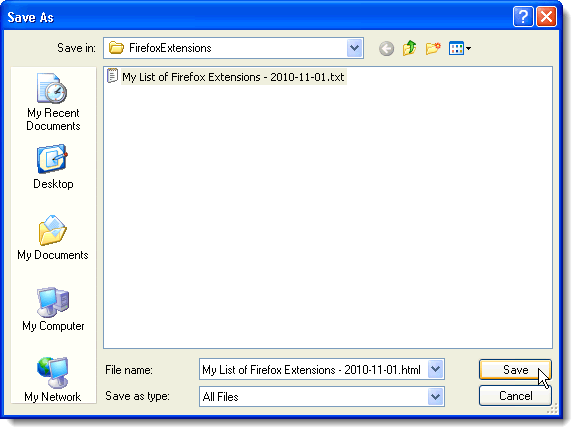
On the Save As dialog box, navigate to the location where you want to save your list. Enter a name for the file in the File name edit box and click Save.
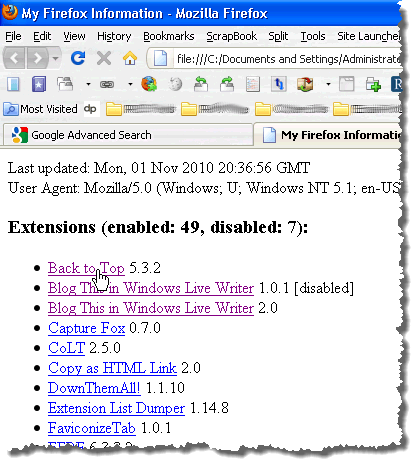
If you saved your file as an HTML file, you can open it in a web browser. Links are provided to the home pages for the installed extensions.
NOTE: We found that, if you save the list of extensions in HTML format using the InfoLister dialog box, every extension in the list had a link, even if it just linked back to the same saved HTML file containing the list of extensions. There is another method of generating an HTML list of installed extensions containing links only for extensions for which they are available. We discuss this method later in this post.
To close the InfoLister dialog box, click the Close button.
You can add InfoLister as a button on your toolbar. For this example, we show you how to add the InfoLister button to the toolbar in Firefox. Refer to your browser’s help if you are using another browser.
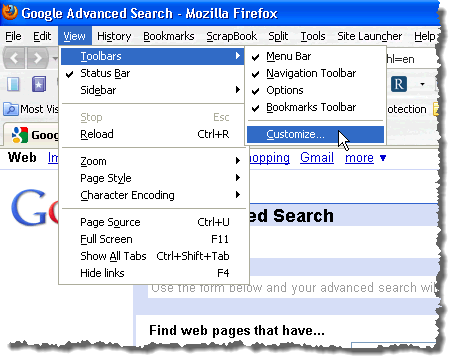
Select Toolbars | Customize from the View menu.
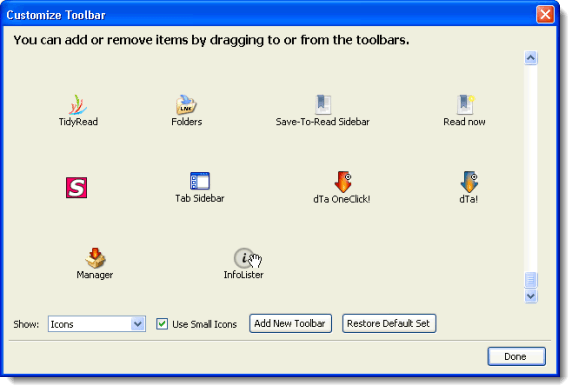
The Customize Toolbar dialog box displays. Scroll down until you see InfoLister in the list of available toolbar buttons. New buttons are usually available at the bottom of the list. Click and drag the InfoLister icon from the Customize Toolbar dialog box to the toolbar.
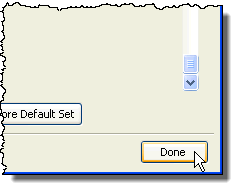
To close the Customize Toolbar dialog box, click the Done button.
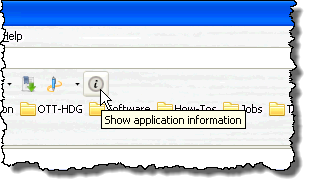
The InfoLister button is now available on the toolbar. If desired, you can go back into the InfoLister options dialog box and turn off the InfoLister option in the Tools menu.
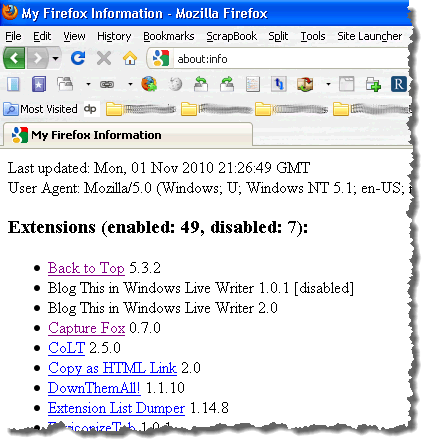
A quick and easy way to generate a list of extensions, themes, and plugins using InfoLister is to enter “about:info” (without the quotes) in the address bar. This generates a list that contains links to home pages for the extensions, when available. You can then save the resulting web page for future reference if you ever have to reinstall Firefox.
NOTE: If you want an HTML list of extensions using InfoLister, we recommend using this method of entering about:info into the address bar. Links are only added when they are available.
NOTE: There is another extension for Firefox, called Mozilla Archive Format, that allows you to save complete web pages in a single file. See http://maf.mozdev.org/ for more information. This would be useful for saving the about:info page generated by InfoLister.
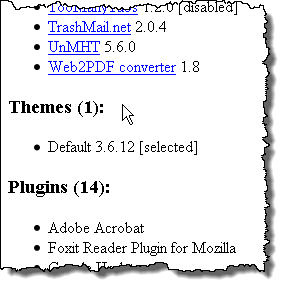
The list of themes we generated using InfoLister was not complete. We have more than just the default theme installed. We got a complete list using Extension List Dumper, so, we recommend you use that to generate a list of installed themes.
It’s a good idea to keep your list of extensions updated and backed up as you install new extensions, in case you have to reinstall Firefox. If you save your list of extensions as an HTML file, using either Extension List Dumper or InfoLister, it will be easier to reinstall most of the extensions in the future using the links provided in the saved HTML file.


