Tips & Tricks, Tutorials, Hacking, Troubleshooting,

When you perform a task that requires administrative privileges in Windows Vista, Windows 7, or Windows Server 2008, the User Account Control (UAC) dialog box displays. User Account Control limits applications to standard user privileges, even in a user account with administrator privileges assigned to it. When you run applications, they are run as a standard user, unless they are specifically approved to have administrator privileges.

User Account Control dialog box

User Account Control approval happens on a per-application basis. If you have an application that you know and trust and use often, and it requires administrator privileges, you may want to download a free tool we found, called UAC Trust Shortcut, that allows you to turn off User Account Control for a specific application.

Download UAC Trust Shortcut from

http://www.itknowledge24.com/.

NOTE: There are two files in the UAC Trust Shortcut .zip file download. UAC Trust Shortcut requires Microsoft .NET Framework 4 to be installed. If you have Microsoft .NET Framework 4, you can install UAC Trust Shortcut using the included .msi file.

If you need Microsoft .NET Framework 4, use the included .exe to install UAC Trust Shortcut. It automatically downloads Microsoft .NET Framework 4 and installs it for you. Then, it runs the .msi file to install UAC Trust Shortcut.

We used the .exe file to install UAC Trust Shortcut because we did not have Microsoft .NET Framework 4 installed yet. This post shows how to install UAC Trust Shortcut using the .exe file. Double-click the setup.exe file.
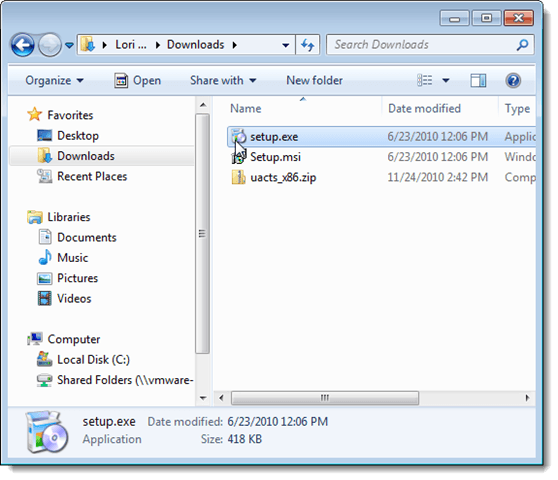
UAC Trust Shortcut installation files

The license for Microsoft .NET Framework 4 displays. Click Accept.

.NET Framework 4 License

The executable file for Microsoft .NET Framework 4 is downloaded.
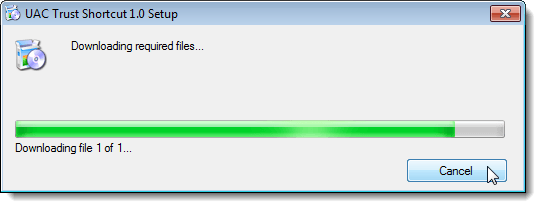
Downloading .NET Framework

Once the download is finished, the User Account Control dialog box displays asking for permission to install Microsoft .NET Framework 4. Click Yes.

UAC dialog box for installing .NET Framework

The progress of the installation of Microsoft .NET Framework 4 displays.
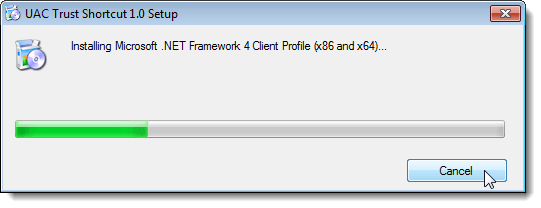
Installing .NET Framework 4

Once the installation of Microsoft .NET Framework 4 is finished, a dialog box displays prompting you to reboot your computer. Click Yes.
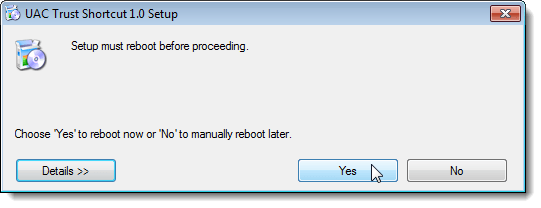
Dialog box to reboot computer

Once your computer has rebooted and you have logged in, the installation of UAC Trust Shortcut begins (the .msi file automatically runs). Click Next on the Welcome screen of the Setup Wizard.
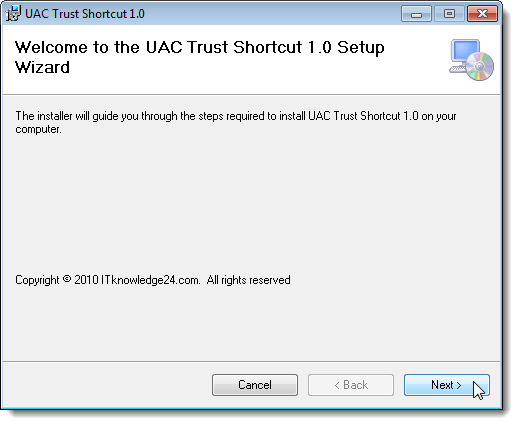
Welcome screen for Setup Wizard

On the License Agreement screen, select the I Agree radio button. Click Next.

UAC Trust Shortcut License Agreement

If you want to change the location where UAC Trust Shortcut is installed, use the Browse button on the Select Installation Folder screen. We accepted the default location.

If you want to see how much space UAC Trust Shortcut is going to take up on your hard drive, click the Disk Cost button.

Clicking the Disk Cost button

The Disk Space dialog box displays information about all the drives available on which you can install UAC Trust Shortcut. Click OK to close the dialog box.
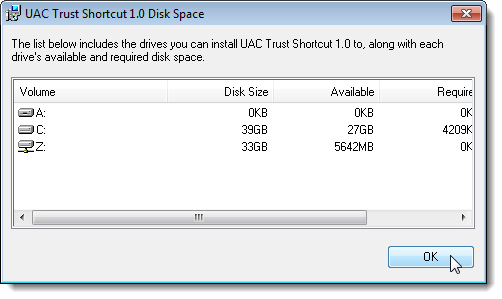
Disk Space dialog box

If you want to install UAC Trust Shortcut for all users on your computer, select the Everyone radio button on the Select Installation Folder screen. Otherwise, select the Just me radio button.

Click Next to continue.

Select Installation Folder

To start installing UAC Trust Shortcut with the selected settings, click Next on the Confirm Installation screen. To change any settings, click Back to go to the previous screens.
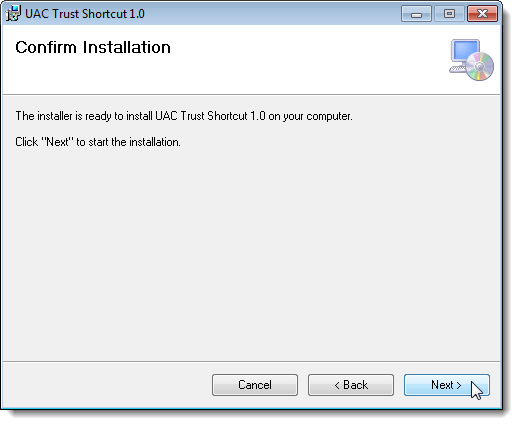
Confirm Installation

The User Account Control dialog box displays asking for permission to run the Setup.msi file. Click Yes.
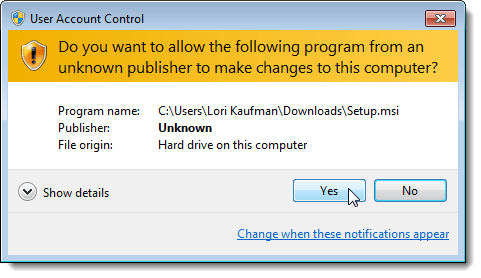
UAC dialog box for running the .msi file

On the Installation Complete screen, click Close to exit the Setup Wizard.
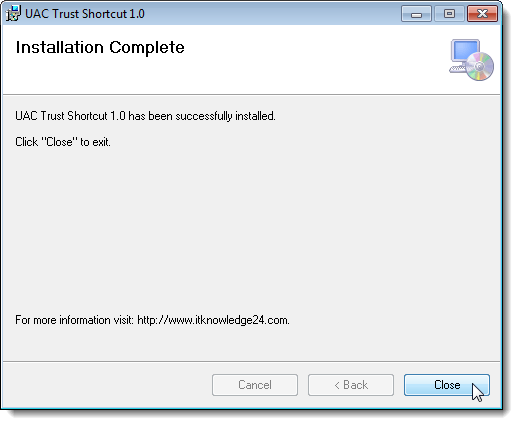
Installation Complete

For the example in this post, we will create a shortcut for CCleaner, which is a useful program for cleaning your Windows computer. It protects your privacy online and makes your computer faster and more secure. If you want to install CCleaner to use and so you can use it as an example when following the steps in this post, you can download CCleaner from

http://www.piriform.com/ccleaner.

Every time CCleaner is run, the User Account Control dialog box displays. The new shortcut will allow us to run CCleaner without the User Account Control dialog box displaying.

UAC dialog box for CCleaner

To run UAC Trust Shortcut, click All Programs on the Start menu and click UAC Trust Shortcut.

Starting UAC Trust Shortcut

On the UAC Trust Shortcut dialog box, click the Add another program button to activate the fields on the dialog box.

Clicking the Add another program button

The User Account Control dialog box displays. Click Yes.

UAC dialog box for adding a program

Enter a name for your shortcut in the Name edit box. You should select a name that is different than the original program shortcut. Click the Browse button.

Clicking the Browse button

Navigate to the folder in which the program is installed for which you want to create the shortcut and select the .exe file for the program. In our case, we selected the CCleaner.exe file. Click Open.

Selecting the CCleaner.exe file

The full path to the executable file is inserted into the Path edit box. Click the Add now link below the Browse button to create the shortcut.

Clicking the Add now link

You can continue to add shortcuts for other programs that require permission using the User Account Control dialog box by repeating the steps above. When you are finished creating shortcuts, click the X button in the upper, right corner of the dialog box to close UAC Trust Shortcut.

Closing UAC Trust Shortcut

The new shortcut is added to the desktop. Double-click the new shortcut to open the program, bypassing the User Account Control dialog box.

New shortcut created

UAC Trust Shortcut installs a service that runs in the background to enable the shortcuts you create. When you start your computer the next time, a dialog box displays asking you for permission to start the service. If you don’t want this dialog box to display every time you start Windows, select the Do not display this prompt next time check box. Click the Enable the UAC Trust Shortcut Service now option to start the service.

NOTE: If you select the Do not display this prompt next time check box, we recommend that you select the Enable the UAC Trust Shortcut Service now option. Otherwise, you will need to start the service manually.

Enabling the UAC Trust Shortcut service

The User Account Control dialog box displays asking for permission to run the program that starts the service. Click Yes.

UAC dialog box for starting the UAC Trust Shortcut service

Be sure you know and trust the programs for which you turn off User Account Control using UAC Trust Shortcut, and that you select the correct program executable files.
If you use third party tools to create shortcuts for programs and you want to use icons from the original program files for your shortcuts, an easy method of extracting icons from program files would be useful. We found a free tool, called Icons from File, that allows you to extract icons or sets of icons from .exe files, .dll files, and .ocx files.
Icons from File works with most versions of Windows from Windows 95 to Windows 7. Server versions of Windows were not listed on the Icons from File website. However, we installed it and ran it in Windows 7 and Windows Server 2008 R2 and it worked in both systems.
Download Icons from File from

http://www.vlsoftware.net/icons-from-file/download.html.

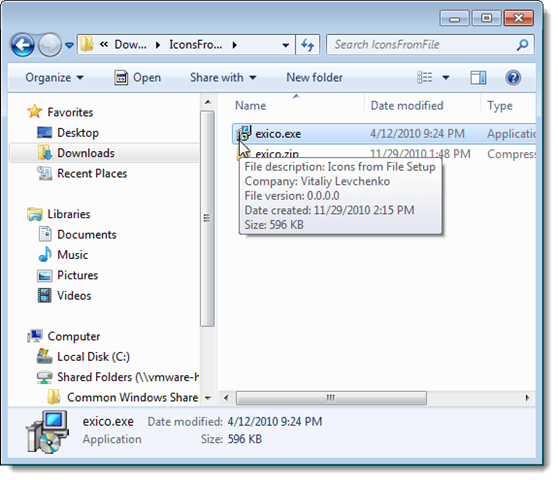
To install Icons from File, unzip the file you downloaded and double-click the .exe file.

Icons from File installation file

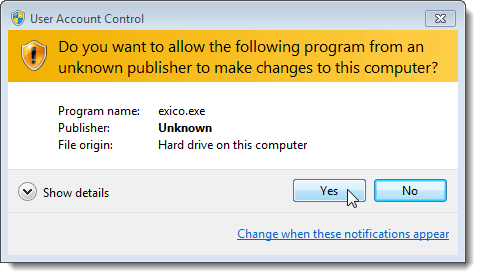
If the User Account Control dialog box displays, click Yes to continue.

NOTE: You may not see this dialog box, depending on your User Account Control settings. See our post, Windows 7 – How to configure UAC (User Account Control), for more information.

User Account Control dialog box

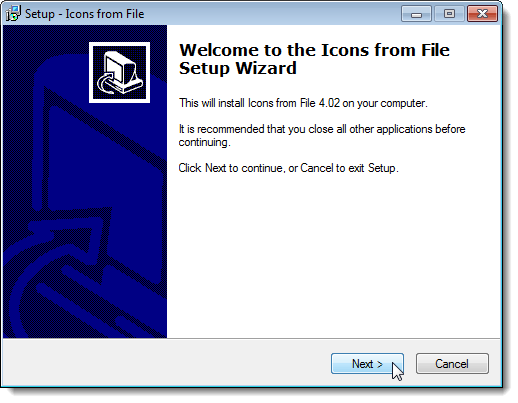
On the Welcome screen on the setup wizard, click Next.

Setup Wizard Welcome screen

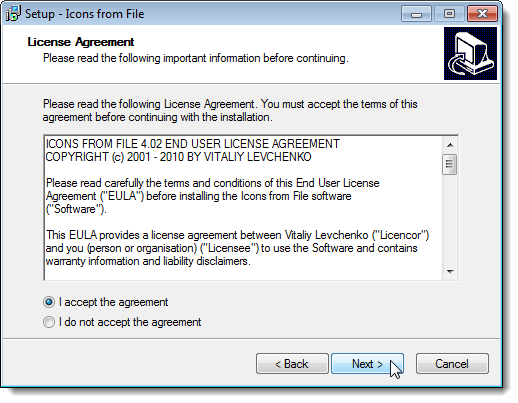
Read through the License Agreement and select the I accept the agreement radio button. Click Next.

License Agreement

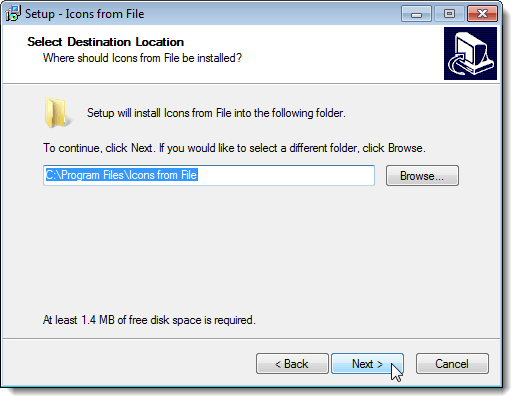
If you want to install Icons from File in a different location than the default, use the Browse button to select another location. We accepted the default location. Click Next.

Select Destination Location

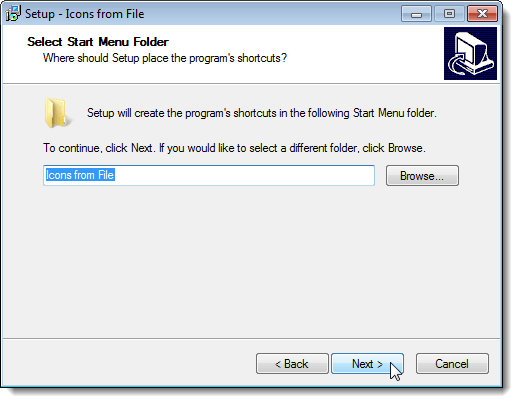
If you want the shortcuts for Icons from File to be put in a different Start menu folder, use the Browse button to select a different folder. Again, we accepted the default. Click Next.

Select Start Menu Folder

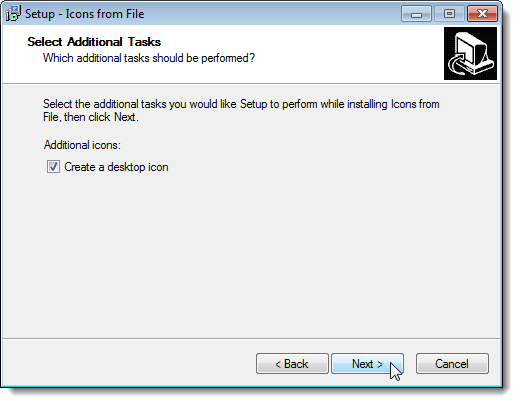
On the Select Additional Tasks screen, the Create a desktop icon check box is selected by default. If you don’t want to create a desktop icon for Icons from File, select the Create a desktop icon check box so there is no check mark in the box. Click Next.

Select Additional Tasks

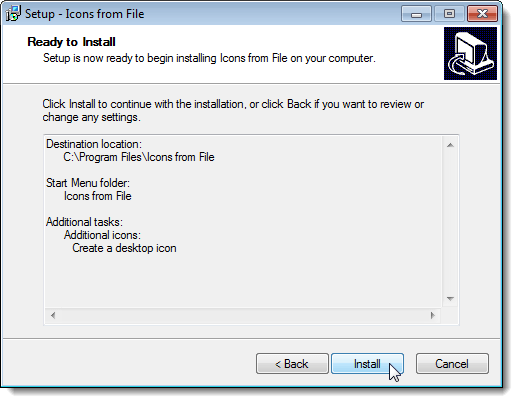
The Ready to Install screen displays with a summary of your selections. Click Install if you are ready to install the program. If you want to make any changes to your selections, use the Back button.

Ready to Install

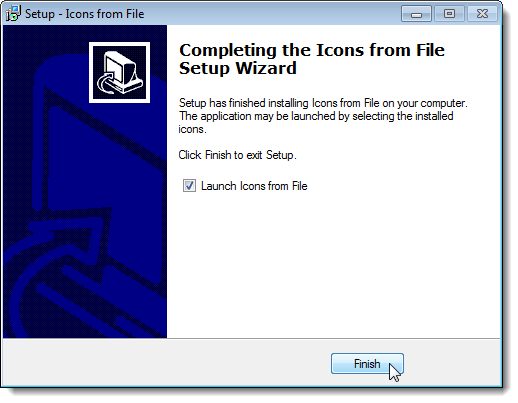
Once the installation is done, the Completing the Icons from File Setup Wizard screen displays. By default, the Launch Icons from File check box is selected and the program will start when you close the setup wizard. If you don’t want to start the program yet, select the Launch Icons from File check box so there is no check mark in the box. To continue with this tutorial, leave the check box selected. Click Finish.

09_completing_setup_wizard

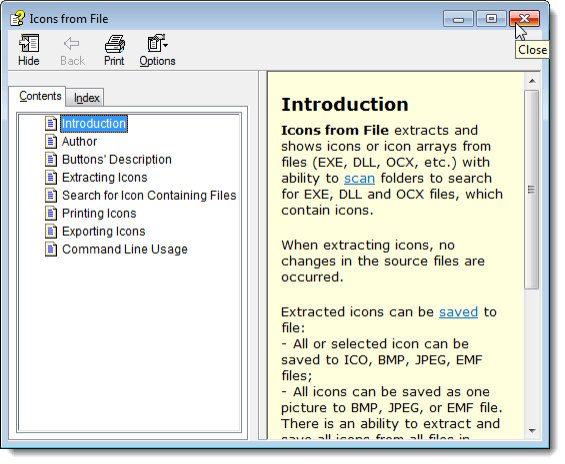
When Icons from File opens for the first time, the help file automatically opens. Click the X button in the upper, right corner of the dialog box to close it.

Closing the help file

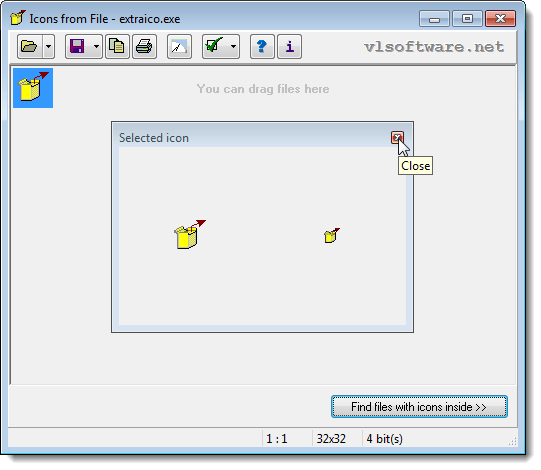
The Selected icon dialog box also displays the first time you open Icons from File. Click the X button in the upper, right corner of that dialog box to close it.

Closing the Selected=

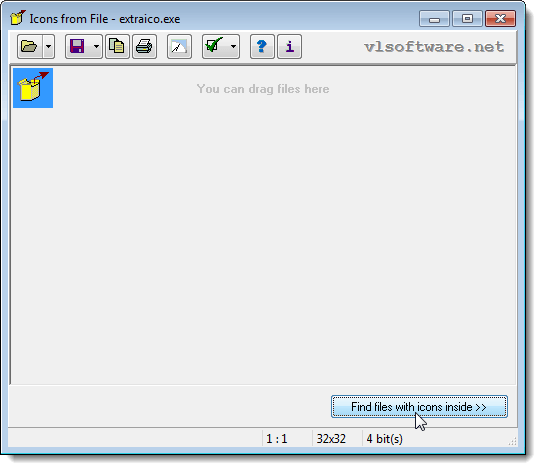
For this example we will extract icons from the Registry Editor executable file using the Find files feature. To do this, click the Find files with icons inside button at the bottom of the dialog box.

Clicking the Find files with icons inside button

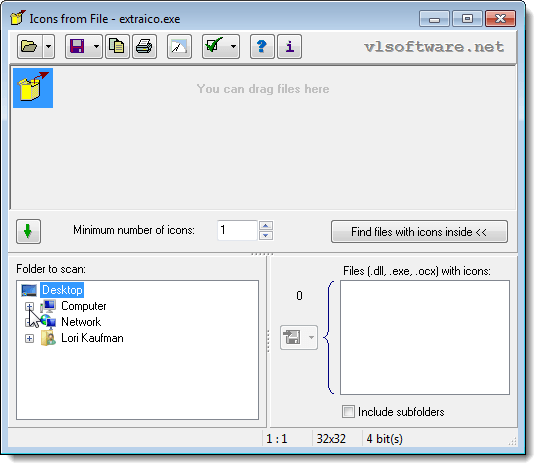
In the Folder to scan box, click the plus sign next to Computer to expand it.

Opening Computer under Folder to scan

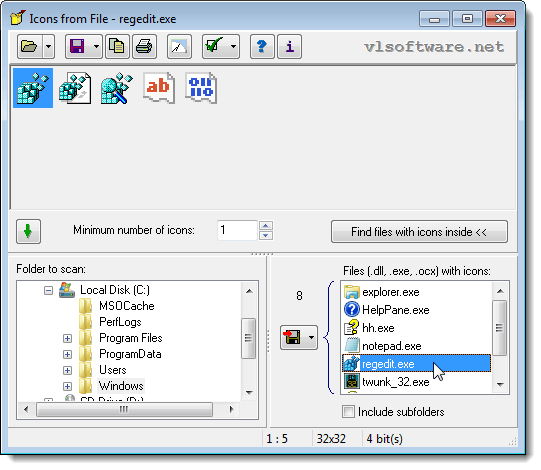
Navigate to the C:\Windows directory. The Files with icons box on the right is populated with all files containing icons in the C:\Windows directory. Select regedit.exe from the list.

Selecting regedit.exe

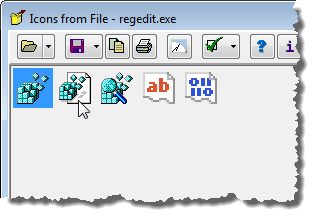
All available icons associated with the regedit.exe file display in the upper half of the Icons from File main window.

Large icons from regedit.exe

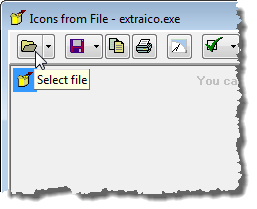
There is another method of opening a file to extract its icons. Click the Select file button (not the arrow on the button).

Clicking Select file button

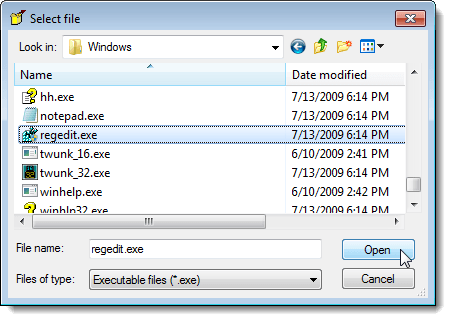
On the Select file dialog box, navigate to the location of the file from which you want to extract icons and select the file. Click Open. The available icons associated with the selected file display in the upper half of the Icons from File main window, as mentioned above.

Selecting regedit.exe on Select file dialog box

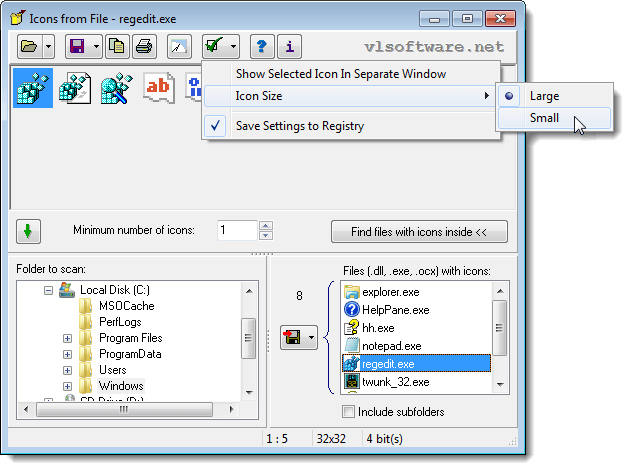
By default, large icons are displayed. If you want to extract small icons, you can change their size. To do this, click the arrow on the Options button (the button with the check mark on it) and select Icon Size | Small from the menu.

Selecting Small Icon Size

The icons change to the small 16×16 size.

Small icons displayed

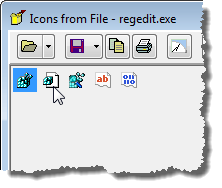
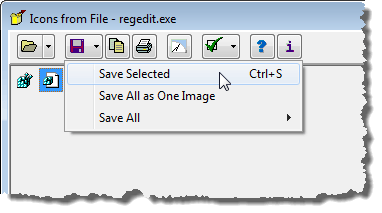
Click on an icon you want to extract to select it. Click the arrow on the Save button (the button with the disk on it) and select Save Selected from the menu.

Choosing the Save Selected=

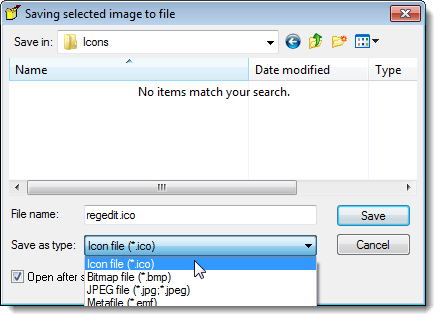
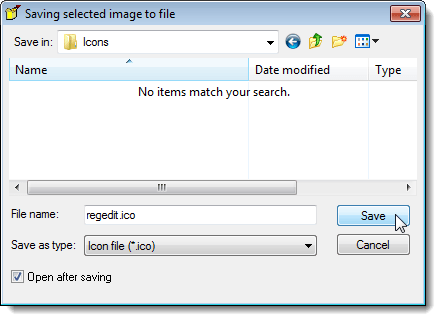
The Saving selected image to file dialog box displays. Navigate to the folder in which you want to save the icon file and enter a name for the file in the File name edit box. To change the type of file, select an option from the Save as type drop-down list. You can save the icon in different formats.

Selecting the file type

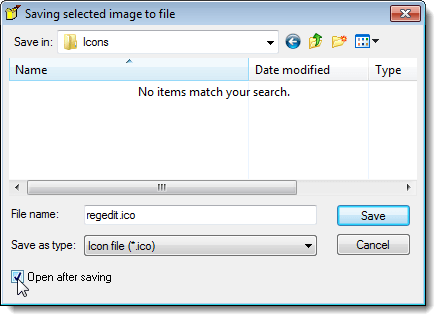
By default, the icon file is opened in the default graphics editor/viewer for the selected file type after you save it. If you don’t want to open the file, select the Open after saving check box so there is no check mark in the box.

Selecting Open after saving check box

Click Save to save the icon file.

Saving the icon file

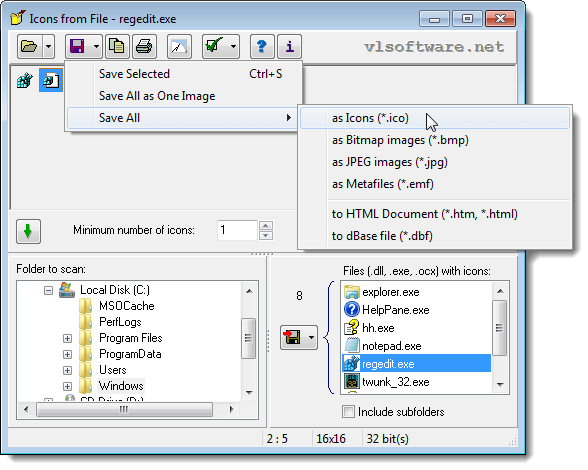
You can also save all the icons displayed at once. To do this, click the arrow on the Save button and select Save All from the menu. The submenu displays the four file types available on the Saving selected image to file dialog box, in addition to two other formats. You can save the icons as an HTML file containing a table of the images in .jpg format. You can also save the icons to a dBase file.

Selecting the Save All option

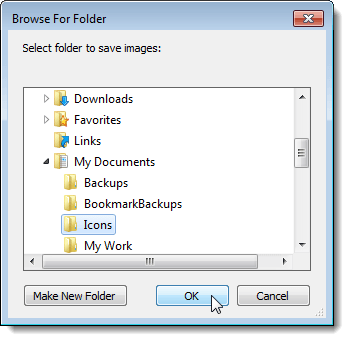
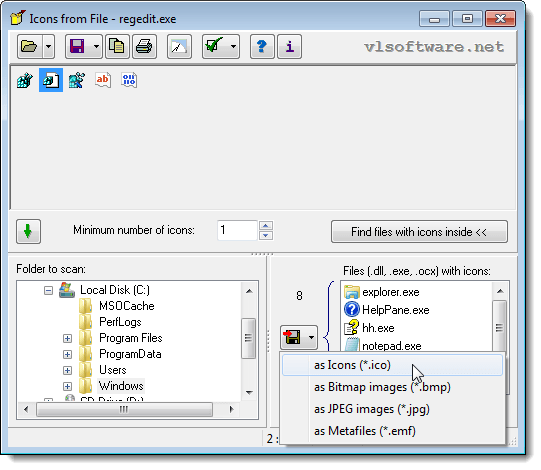
We selected the as Icons (*.ico) option. The Browse For Folder dialog box displays. Navigate to the folder in which you want to save the icon files and click OK.

Browse For Folder dialog box

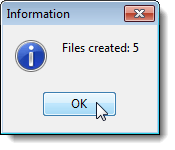
A dialog box displays telling you how many files were created. Click OK to close it.

Files created dialog box

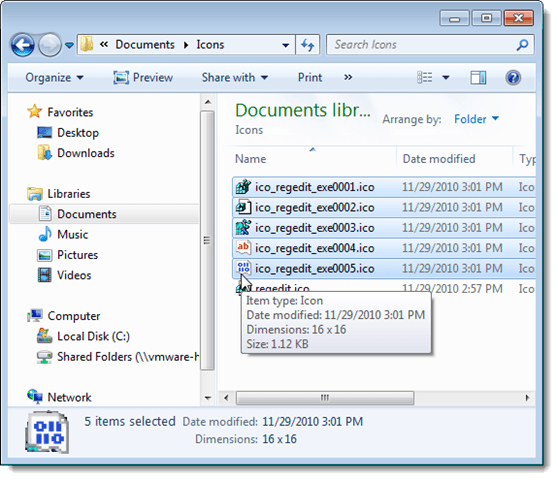
Numbered filenames are automatically assigned to the files, indicating the file type and the name of the file from which the icons were extracted.

Files created by Save All option

You can also choose to save all the icons from all the files found containing icons in the selected folder. To do this, click the arrow button on the Save button in the right half of the bottom pane. Select the desired file type from the drop-down menu. Select the folder in which to save the files from the Browse For Folder as above.

Saving all icons in a folder

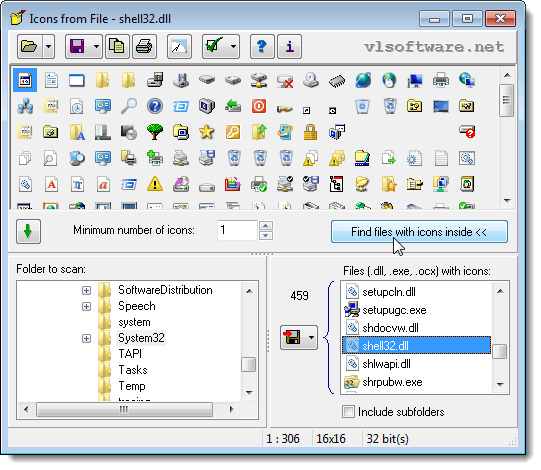
Some files may have a lot of icons in them, such as the shell32.dll file in the C:\Windows\System32 directory. If you want to view more icons at a time, you can hide the bottom pane. To do this, click the Find Files with icons inside button.

Turning off bottom pane

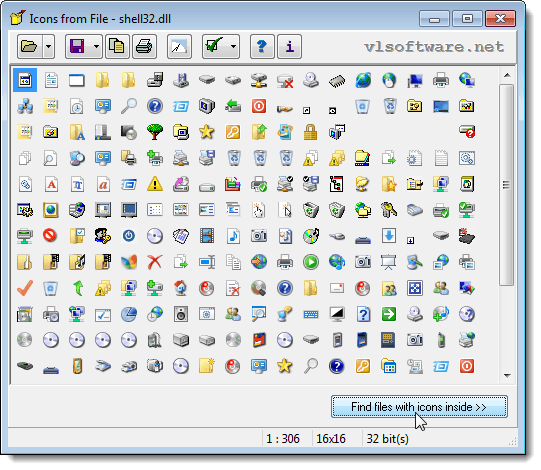
The bottom pane is hidden and you can view more icons at one time. Click the Find files with icons inside button again to view the bottom pane.

Bottom pane hidden

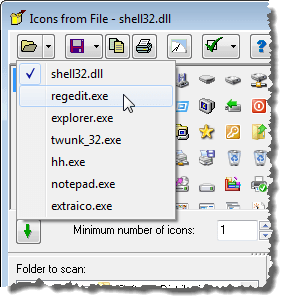
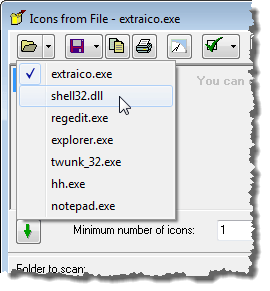
If you want to view icons from a file you opened previously, click the arrow on the Open button and select the file from the list.

Opening file from list

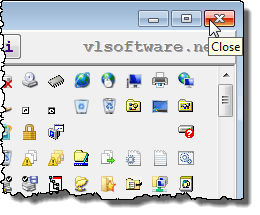
To close Icons from File, click the X button in the upper, right corner of the dialog box.

Closing Icons from File

Open Icons from File again. Open a previously opened file again by clicking the arrow on the Open button and selecting a file from the list.

Selecting a previously opened file

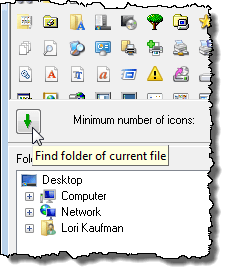
To open the folder containing the selected file, click the down arrow button on the left side of the Icons from File dialog box.

Finding the folder for the currently open file

The folder is selected in the Folder to scan list and all files found in that folder containing icons are listed in the Files with icons box on the right.

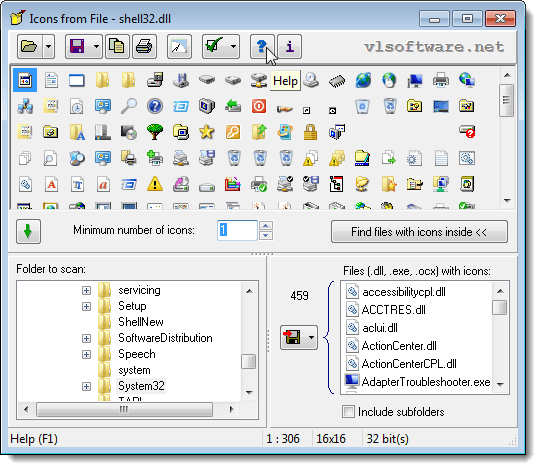
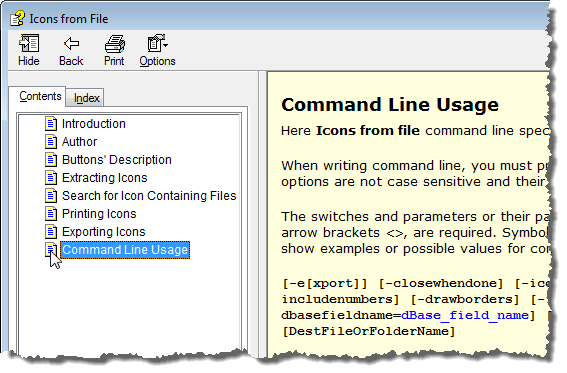
You can automate icon extraction using Icons from File on the command line. To find out how to do this, click the Help button on the toolbar.

Clicking the Help button

A help topic displays instructions for using the command line to automate icon extraction, listing available parameters to use.

Command Line Usage help

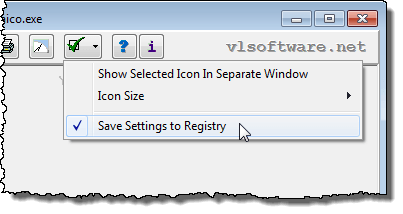
You can run Icons from File from a USB flash drive in portable mode. To do this, you need to tell Icons from File not to save settings in the registry. Open Icons from File, if it is not already open. Click the arrow on the Options button and select the Save Settings to Registry so there is no check mark to the left of the option.

Turning off the Save Settings by Registry option

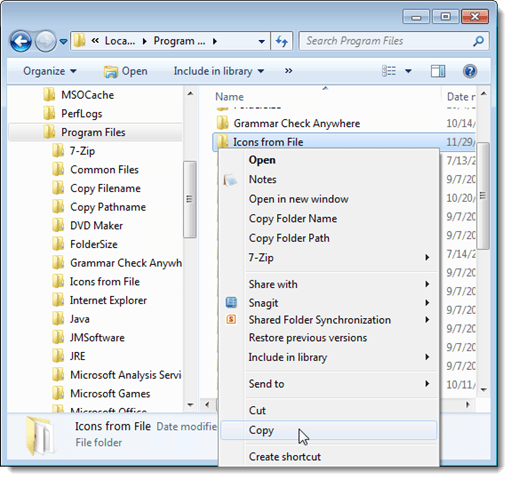
Now you can copy the Icons from File program folder to a USB flash drive and run the program from there on any computer.

Copying Icons from File program to another location

NOTE: When you copy Icons from File to a USB flash drive to run as a portable program, the list of recently opened files is cleared, except for the extraico.exe file. However, once you run the program from the USB flash drive and open files, these files will be available in the list of recently opened files, if the file is available when Icons from File is run. If the file is not available, it is deleted from the list and from the .ini file used to save the settings for the portable version of Icons from File.