When you delete a file in Windows, you only remove bits of information from the file, so it appears deleted in the operating system. Easily available file recovery software can be used to retrieve the deleted files.
To securely delete a file, you must use a program that “shreds” the file. We have previously written about different methods for securely deleting files in Windows (see our posts, Securely Delete Files Using the Context Menu in Windows and Securely delete files from your hard disk using Cipher) and even how to do it in Linux (see our post, Securely Delete Files in Linux).
We have found another free tool, called File Shredder, that securely deletes files from your Windows system by rewriting the files with a random series of binary data multiple times. This overwrites the actual contents of each file, making recovery of the files “mostly theoretical,” as the website says.
In this two-part series of posts, we show you how to securely delete files using File Shredder and using the context menu options in Windows Explorer provided by File Shredder. We also show you how to use File Shredder to securely wipe the free space on your hard drive, so files deleted using non-secure methods are irretrievable.
Download File Shredder from
http://www.fileshredder.org/.
Install File Shredder
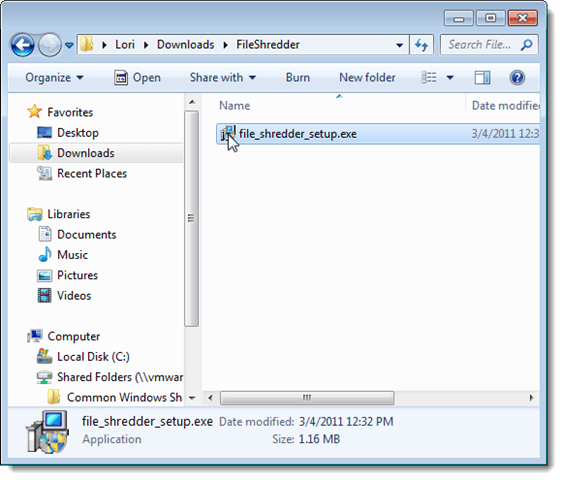
To install File Shredder, double-click on the .exe file you downloaded.

If the User Account Control dialog box displays, click Yes to continue.
NOTE: You may not see this dialog box, depending on your User Account Control settings. See our post, Windows 7 – How to configure UAC (User Account Control), for more information.

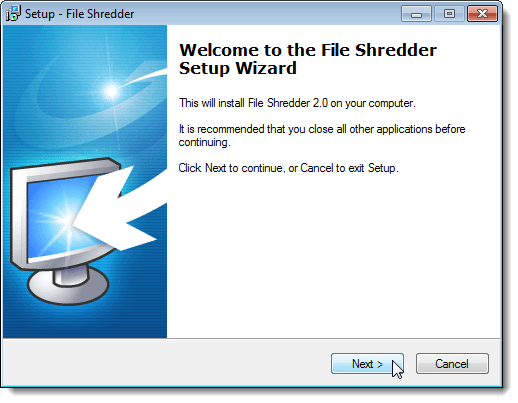
The Welcome screen on the setup wizard displays. Click Next.

Read through the License Agreement and select the I accept the agreement radio button. Click Next.

The Select Destination Location screen displays. If you want to install File Shredder to a different location other than the default location listed in the edit box, use the Browse button to select another location. We accepted the default location. Click Next to continue.

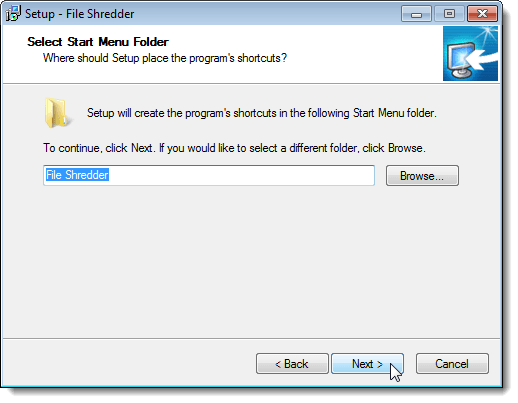
The Select Start Menu Folder screen displays. If you want to add the shortcuts for File Shredder to a different Start menu folder than the default listed in the edit box, use the Browse button. We accepted the default Start menu folder. Click Next to continue.

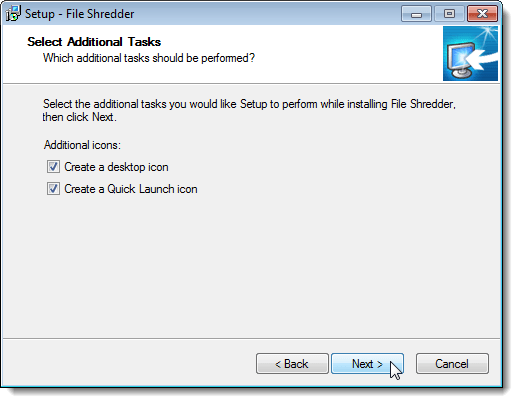
On the Select Additional Tasks screen, you can select the Create a desktop icon check box to put a shortcut to File Shredder on the desktop and the Create a Quick Launch icon check box to put a shortcut in the Quick Launch bar. These options are not selected by default. Click Next.

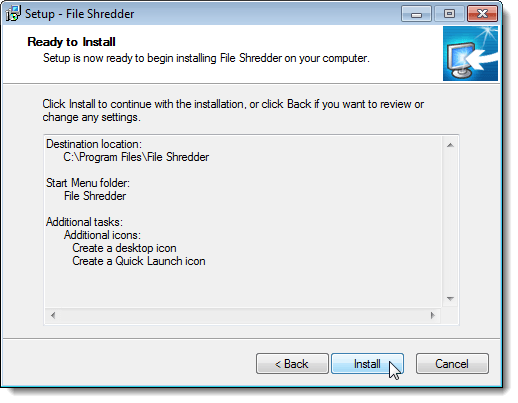
The Ready to Install screen displays with a summary of the settings you selected. If you want to change any of the settings, use the Back button. Otherwise, click Install to continue with the installation.

Once the installation is done, the Completing the File Shredder Setup Wizard screen displays. If you want File Shredder to start as soon as you close the setup wizard, select the Launch File Shredder check box so there is a check mark in it. It should be selected by default. Click Finish to close the setup wizard.

Select Files to Shred in File Shredder
If you selected the Launch File Shredder check box before closing the Setup Wizard, File Shredder should automatically open. If not, double-click the shortcut on the desktop (if you chose to create one there) or open File Shredder from the Start menu.
To add a file or multiple files to be shredded, click the Add File(s) link under File Shredder in the left pane.

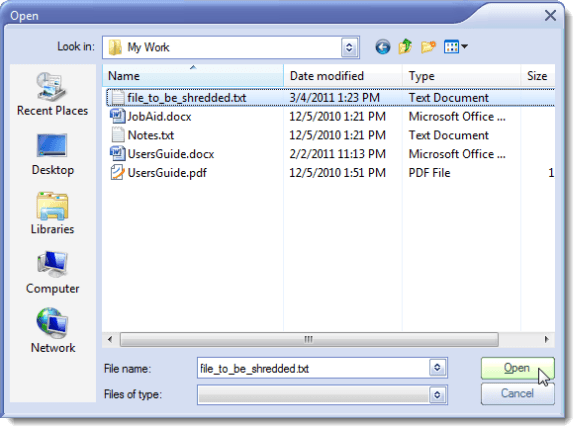
The Open dialog box displays. Navigate to the location of the file(s) you want to shred. Select the file(s) to be shredded and click Open.
NOTE: When selecting multiple files, the files all have to be in the same folder to select them. Use the Shift and Ctrl keys to select multiple files in a folder, just like you would in Windows Explorer. If you want to select files from different folders, select files from one folder, click Open, and then click the Add File(s) link again to access the Open dialog box again to select files from a different location.

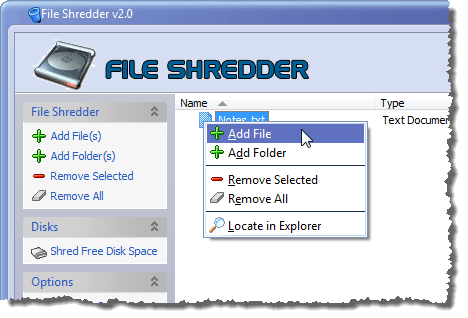
The file is added to the list on the right in File Shredder. You can also add files using the context menu in the right pane in File Shredder. The context menu also allows you to remove the selected file or all files. If you want to find out in which folder the selected file is located, select the file, right-click on it and select the Locate in Explorer option from the popup context menu.

Change Settings in File Shredder
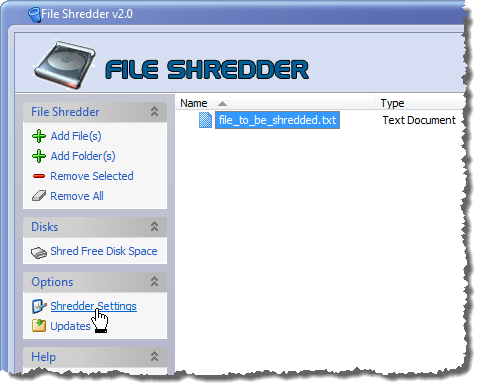
Before you shred the file, click the Shredder Settings link to view the settings you can change within File Shredder.

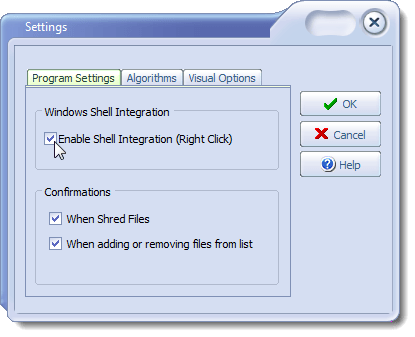
The Settings dialog box displays with the Program Settings tab active. If you want to be able to shred files using the context menu in Windows Explorer, select the Enable Shell Integration (Right Click) check box. We will show you how to use that feature later in this post.
The Confirmations box contains check boxes that allow you to turn on and off confirmation dialog boxes that display when performing specific actions using File Shredder.

Click the Algorithms tab to select the Default secure algorithm you want to use from the drop-down list. The options range from a Simple One Pass algorithm (the files are rewritten with a random series of binary data one time) to the Department of Defense standard (DoD 5220-22.M), which makes 7 passes over the files being shredded. You can also select the most secure Guttman algorithm, which rewrites the files with binary data 35 times.

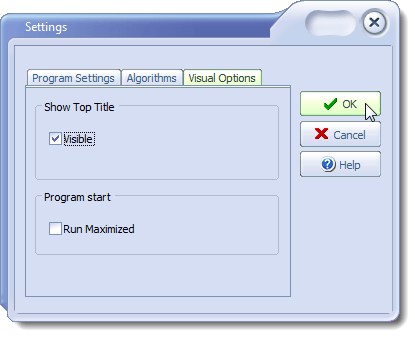
Click the Visual Options tab to specify whether to save some space on the File Shredder interface by hiding the top pane (the Visible check box in the Show Top Title box) and whether to run File Shredder maximized when the program starts (the Run Maximized check box in the Program start box). Click OK when you are finished selecting your desired settings on the three tabs.

Shred Selected Files
To shred the files you added to File Shredder, click the Shred Files Now button.
NOTE: All files added to the list in File Shredder will be shredded. You cannot select certain files in the list to be shredded. If there is a file or more than one file in the list that you don’t want shredded yet, use the Remove links in the left pane or the Remove options on the context menu discussed earlier to remove the file(s) from the list.

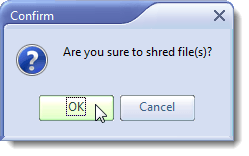
A Confirm dialog box displays to make sure you want to shred the selected file(s). Click OK to shred the file(s).
NOTE: Remember, the files you shred will be permanently deleted and will not be recoverable.

Close File Shredder
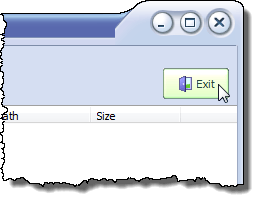
To close File Shredder, click the Exit button.
NOTE: You can also click the X button in the upper, right corner of the File Shredder window to close the program.

Wrap Up
This was the first post in a two-part series about using File Shredder to securely delete files and securely wipe the free space on your hard drive(s).
In this post, we covered installing File Shredder, shredding files in File Shredder, and changing settings in File Shredder.
Stay tuned for Part II, where we will cover shredding files using the context menu in Windows Explorer and securely wiping the free space on your hard drive(s).
![sshot-2011-03-07-[23-27-10]](http://www.simplehelp.net/wp-content/uploads/sshot-2011-03-07-23-27-10.png)
![sshot-2011-03-07-[23-28-17]](http://www.simplehelp.net/wp-content/uploads/sshot-2011-03-07-23-28-17.png)
![sshot-2011-03-07-[23-36-19]](http://www.simplehelp.net/wp-content/uploads/sshot-2011-03-07-23-36-19.png)
![sshot-2011-03-07-[23-36-38]](http://www.simplehelp.net/wp-content/uploads/sshot-2011-03-07-23-36-38.png)
![sshot-2011-03-07-[23-36-38]](http://www.simplehelp.net/wp-content/uploads/sshot-2011-03-07-23-36-381.png)
![sshot-2011-03-07-[23-39-05]](http://www.simplehelp.net/wp-content/uploads/sshot-2011-03-07-23-39-05.png)
![sshot-2011-03-07-[23-40-28]](http://www.simplehelp.net/wp-content/uploads/sshot-2011-03-07-23-40-28.png)
![sshot-2011-03-07-[23-43-30]](http://www.simplehelp.net/wp-content/uploads/sshot-2011-03-07-23-43-30.png)
![sshot-2011-03-07-[23-44-36]](http://www.simplehelp.net/wp-content/uploads/sshot-2011-03-07-23-44-36.png)
![sshot-2011-03-08-[01-20-55]](http://www.simplehelp.net/wp-content/uploads/sshot-2011-03-08-01-20-55.png)
![sshot-2011-03-08-[01-57-44]](http://www.simplehelp.net/wp-content/uploads/sshot-2011-03-08-01-57-44.png)
![sshot-2011-03-08-[01-21-45]](http://www.simplehelp.net/wp-content/uploads/sshot-2011-03-08-01-21-45.png)









![sshot-2011-03-07-[12-04-03]](http://www.simplehelp.net/wp-content/uploads/sshot-2011-03-07-12-04-03.png)
![sshot-2011-03-02-[19-42-29]](http://www.simplehelp.net/wp-content/uploads/sshot-2011-03-02-19-42-29.png)
![sshot-2011-03-02-[19-43-46]](http://www.simplehelp.net/wp-content/uploads/sshot-2011-03-02-19-43-46.png)
![sshot-2011-03-02-[19-43-57]](http://www.simplehelp.net/wp-content/uploads/sshot-2011-03-02-19-43-57.png)
![sshot-2011-03-02-[19-44-10]](http://www.simplehelp.net/wp-content/uploads/sshot-2011-03-02-19-44-10.png)
![sshot-2011-03-07-[12-20-39]](http://www.simplehelp.net/wp-content/uploads/sshot-2011-03-07-12-20-39.png)
![sshot-2011-03-07-[12-40-45]](http://www.simplehelp.net/wp-content/uploads/sshot-2011-03-07-12-40-45.png)
![sshot-2011-03-02-[19-44-24]](http://www.simplehelp.net/wp-content/uploads/sshot-2011-03-02-19-44-24.png)
![sshot-2011-03-02-[19-44-56]](http://www.simplehelp.net/wp-content/uploads/sshot-2011-03-02-19-44-56.png)
![sshot-2011-03-02-[19-45-07]](http://www.simplehelp.net/wp-content/uploads/sshot-2011-03-02-19-45-07.png)
![sshot-2011-03-02-[19-45-18]](http://www.simplehelp.net/wp-content/uploads/sshot-2011-03-02-19-45-18.png)
![sshot-2011-03-02-[19-45-55]](http://www.simplehelp.net/wp-content/uploads/sshot-2011-03-02-19-45-55.png)
![sshot-2011-03-02-[19-46-06]](http://www.simplehelp.net/wp-content/uploads/sshot-2011-03-02-19-46-06.png)
![sshot-2011-03-02-[19-46-14]](http://www.simplehelp.net/wp-content/uploads/sshot-2011-03-02-19-46-14.png)


