Ubuntu 10.04 includes a top panel and a bottom panel by default. If you prefer one panel at the bottom like the Windows Taskbar, this post shows you how to accomplish that.
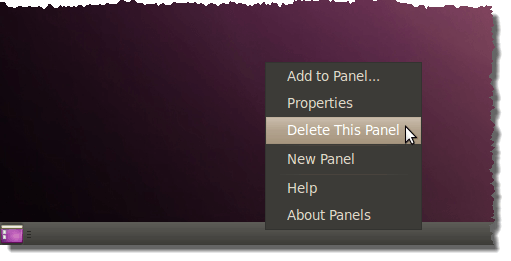
To begin, delete the bottom panel. Right-click on the bottom panel and select Delete This Panel from the popup menu.
A confirmation dialog box displays to make sure you want to delete the panel. Click Delete.

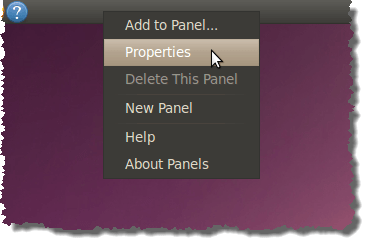
Now, we need to move the top panel to the bottom. Right-click on the top panel and select Properties from the popup menu.
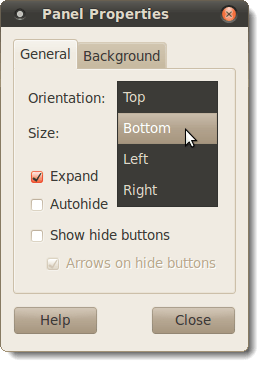
On the Panel Properties dialog box, select Bottom from the Orientation drop-down list. Click Close.
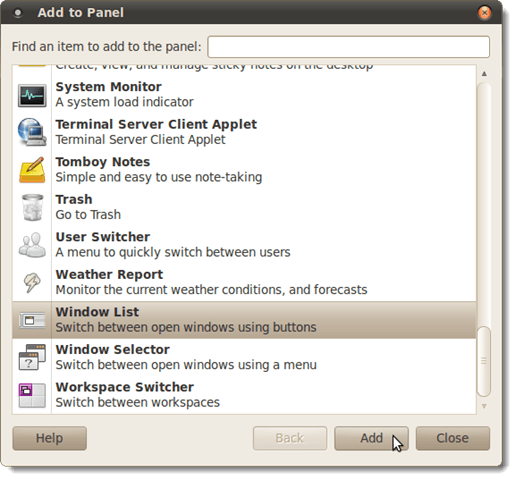
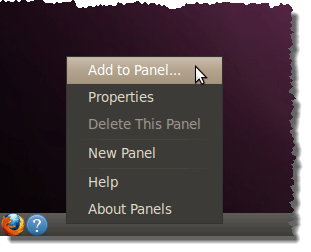
We will now add the Window List buttons to the bottom panel that will act like the program buttons on the Windows Taskbar. Right-click on the bottom panel and select Add to Panel from the popup menu.

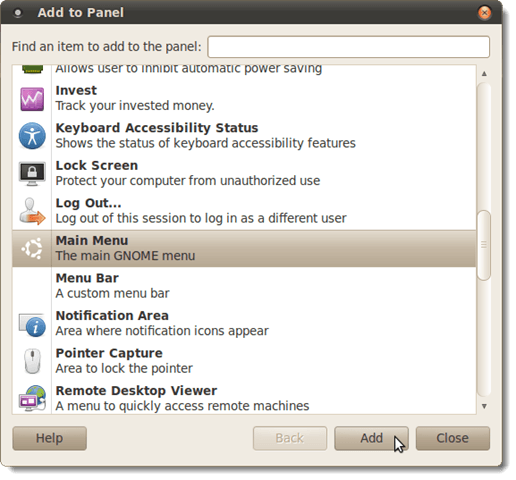
On the Add to Panel dialog box, scroll until you find Window List. Select it and click Add. Click Close.
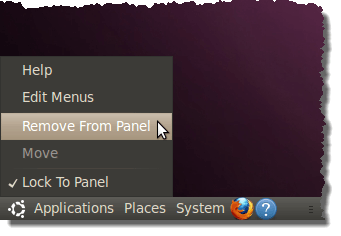
We will replace the Menu Bar on the bottom panel with the Main Menu to make it look and act more like the Start menu in Windows. Right-click anywhere on the Menu Bar and select Remove From Panel from the popup menu.
To add the Main Menu to the bottom panel, right-click on the bottom panel and select Add to Panel from the popup menu.
On the Add to Panel dialog box, scroll until you find Main Menu. Select it and click Add. Click Close.
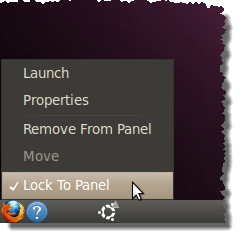
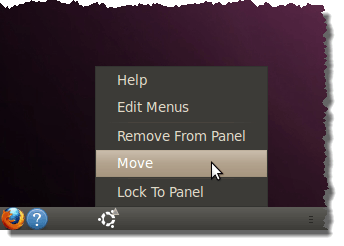
To make the panel look like the Windows Taskbar, we need to move the Main Menu we just added to the far left. To do this, we must move the icons that are currently on the left, which are generally the Firefox icon and the Help icon. Right-click the Firefox icon and select Lock To Panel from the popup menu to remove the check mark. Do the same for the Help icon and for any other icons that may be there (except for the Main Menu icon).
Now that we have unlocked the icons on the far left, we can move the Main Menu into the far left corner. Right-click on the Main Menu icon and select Move from the popup menu. The cursor turns into a hand and you can immediately move the Main Menu icon just by moving the mouse all the way to the left.
NOTE: DO NOT click again until you have moved the icon to where you want it. Clicking after selecting Move sets the position of the icon.
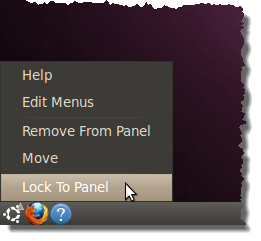
Now we want to lock the Main Menu and the other icons to the panel so we can move the Window List buttons all the way over next to the icons. Right-click on the Main Menu icon and select Lock To Panel from the popup menu. Do the same for the Firefox icon, the Help icon and any other icons that may be there.
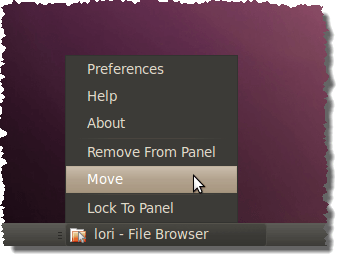
We can now move the Window List buttons to the left right next to the Firefox icon, the Help icon and any other icons that are there. This provides as much room as possible for Window List buttons on the bottom panel. Right-click on the left side of the Window List bar and select Move from the popup list. Again, the cursor turns into a hand. Move the mouse as far to the left as the Windows List buttons will go and click to set the position.
NOTE: It can be hard to see the three bars that make up the left side of the Window List bar. The easiest way to see the left edge of the Window List buttons is to start a program and minimize it.
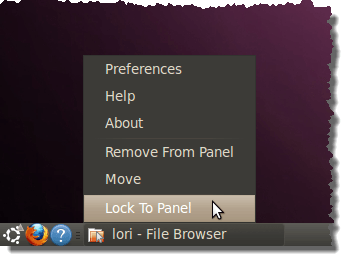
To lock the Window List buttons in place, right-click on the left side of the Window List buttons and select Lock To Panel.
The bottom panel now should look and act like the Windows Taskbar.

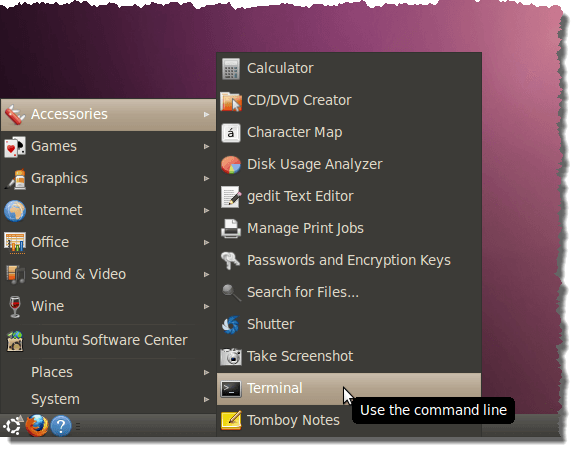
If you want to restore the panels to their original configuration, open a Terminal window.
Enter the following commands at the command line.
$ sudo gconftool-2 –shutdown
$ sudo rm –rf .gconf/apps/panel
$ sudo pkill gnome-panel
NOTE: There are two dashes before shutdown in the first command, one dash before rf in the second command, and one dash between gnome and panel in the third command.

After entering the commands, enter Exit to close the Terminal window and restart your system.
These are just basic changes. The panels in Ubuntu are much more flexible than the Windows Taskbar. Many items can be easily added to the panels, removed from the panels and configured on the panels.

No comments:
Post a Comment