There are many ways to convert a CD to MP3 or other format, many of them as simple as point-and-click. Sometimes, though, there’s nothing quite like getting your hands dirty and using the Terminal. That’s what this article covers: ripping a CD in the Terminal using cdparanoia, and then converting those files to MP3 using LAME.
Ripping the CD with cdparanoia
The cdparanoia ripping tool is often considered among the best tools for ripping CDs available. It rips the data directly from the CD, with no analog step between, and is also good at reporting any jitter it senses while ripping, so you know that your CD rip is as close to the original as possible.
To install cdparanoia in Debian or Ubuntu, type the following into a Terminal:
sudo apt-get install cdparanoia
Any additional libraries will be pulled in and installed along with cdparanoia, and when the installation is complete, you’re ready to go.
First, let’s create a folder on the Desktop, called CDRip, where the ripped tracks will eventually land.
mkdir /home/username/Desktop/CDRip/
Now cd to the directory we just created:
cd /home/ericcflem/Desktop/CDRip/
Insert the CD, and when it has loaded, type the following command:
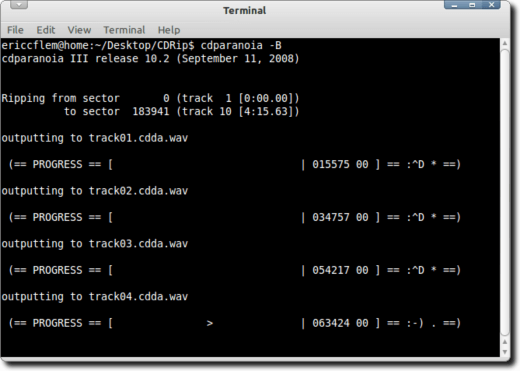
cdparanoia -B
This tells cdparanoia to batch rip the CDDA tracks from the CD as standard 16-bit WAV files. If you want to learn more about the nuts and bolts of cdparanoia, check out its documentation on the cdparanoia home page.
As cdparanoia works, you’ll see a progress bar for each track, as well as a smiley face which represents any errors or inconsistencies, if present.
Once the rip has ended, your folder will now be full of WAV files and it’s time to convert them to MP3.
Convert WAV to MP3 Using Perl Audio Converter
This is another simple step, which depending on your needs can be done one of two different ways. The first method uses the Perl Audio Converter, a collection of scripts which uses different command line programs to convert to and from a wide range of formats and codecs.
It does much more than we’ll use it for in this tutorial, but even if you never scratch the surface of what it can do, it’s a great tool for converting music. To install it in Ubuntu or Debian (or Mint or other derivatives), type the following:
sudo apt-get install pacpl
Just as with cdparanoia, installing Perl Audio Converter will also grab any dependencies, such as lame or other libraries. Once installed, it’s ready to use with the following command:
pacpl -t mp3 –bitrate 256 *.wav –delete
The above command invokes Perl Audio Converter (pacpl), tells it that we want to convert our files to MP3 (-t mp3), with a bitrate of 256 kb/s (–bitrate 256), then tells it to only convert wav files (*.wav), and when we’re done, to delete the originals (–delete).
While this is happening, you should see not so much a progress, as a notification that each conversion is happening, like this:
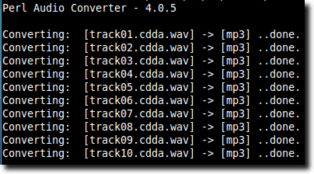
When Perl Audio Converter is done converting your WAV files to MP3, you will end up with a folder full of MP3 files, all encoded with a bitrate of 256 kb/s; the original WAV files will be deleted, leaving you nothing but the MP3 files.
Convert WAV to MP3 Using LAME
There is another method, and that is to use LAME directly to do the conversion. The big advantage is that Perl Audio Converter doesn’t offer a simple way to do variable bitrate encoding, while LAME does. The advantage to variable bitrate encoding is that each sample is analyzed and is given the correct bitrate, depending on the complexity, so you should get high quality at smaller sizes.
The command used, on the other hand, is a bit more complex:
for file in *.wav; do $(lame -V0 “$file” “${file%.wav}.mp3″); done
Basically, this says that for every file that is in WAV format, we should tell lame to encode that file using the V0 quality setting, giving it the MP3 extension, and then quit when all files have been converted. During this process, because each sample may be different, you’ll get a view of exactly what’s going on.
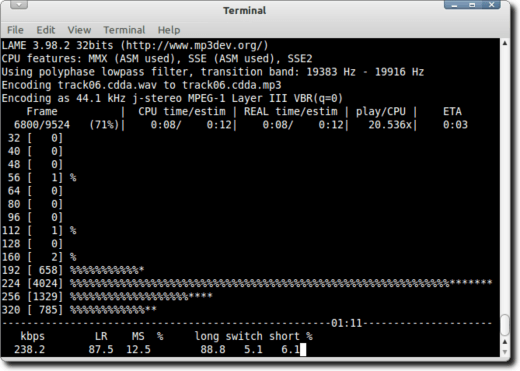
This shows a few things, the most important of which are the progress of the conversion, the average bitrate attained during the conversion, and and ETA for when the process will be complete.
Note: This command doesn’t delete the original WAV files, but you can do this manually or by typing “rm *.wav” (without the quotes), from the Terminal while the active folder is the one containing the music we’ve been converting.
And that’s really all you need to know about ripping your CDs and converting them to MP3. It’s a pretty quick process, and once you’re finished you’ll have perfectly encoded music, ready for playback in your portable player or Desktop music application. The only thing left, really, is to properly tag the files, but that’s a topic for another article.

No comments:
Post a Comment