If you take a lot of screenshots of web pages, there is an easy way to do this in Google Chrome. You can also annotate and share them easily, all from within Chrome, using the Awesome Screenshot add-on.
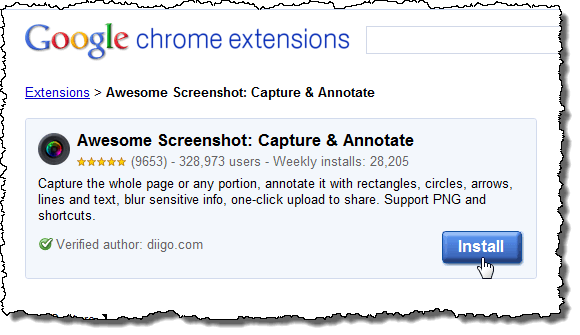
To install Awesome Screenshot in Google Chrome, go to the following web page:
https://chrome.google.com/extensions/detail/alelhddbbhepgpmgidjdcjakblofbmce.
Click the Install button.
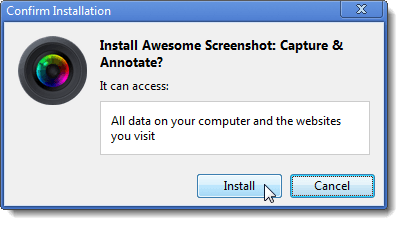
A Confirm Installation dialog box displays telling you what Awesome Screenshot can access. Click Install to continue with the installation.
NOTE: If you are nervous about the fact that Awesome Screenshot can access all the data on your computer, you can set up Windows 7 as a virtual machine using VirtualBox (see our post, How to install Windows 7 on a PC with VirtualBox), install Google Chrome in the virtual machine, and take your screenshots using Awesome Screenshot in Google Chrome in the virtual machine, saving the files in a directory shared between the virtual machine and your regular computer (see our post, Share Folders between Host and Guest OS in VirtualBox).
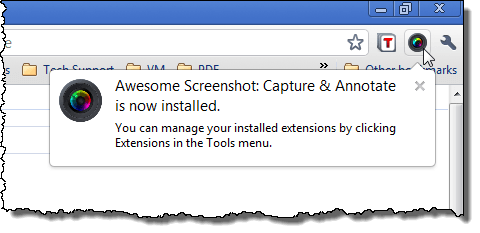
When the installation is finished, the Awesome Screenshot button displays on the toolbar and a message displays telling you the extension is now installed.
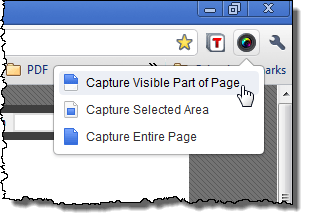
Once you have navigated to the web page you want to capture, click the Awesome Screenshot button on the toolbar and select an option. You can choose to capture only what is visible in the main part of the browser, a selected area, or the entire page.
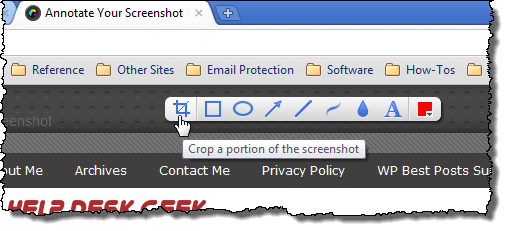
The screenshot displays on a new tab titled Annotate Your Screenshot with a toolbar at the top. You can crop the screenshot to show only a portion of the screenshot. To do this, click the crop tool on the Awesome Screenshot toolbar.
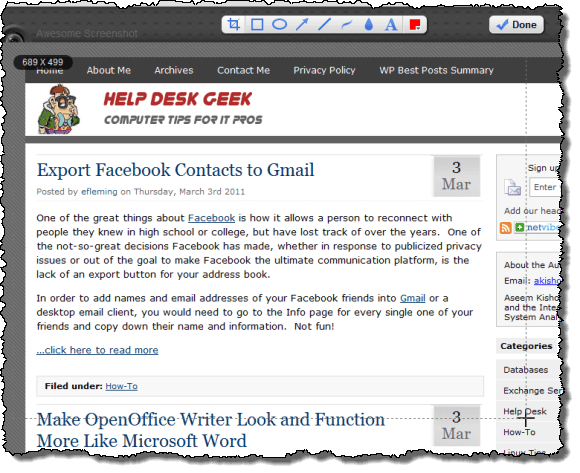
The cursor turns into a crosshair. Click and hold the mouse button in the upper, left corner of the area of the screenshot you want to save and draw a box down to the lower, right corner of the area. The measurements of the box you are drawing display in the upper, left corner of the box.
Once you have the size box you want, release the mouse button. A box displays with the content of the selected area being lighter than the area outside of the box. Click the Crop button to finalize the cropped image. If you change your mind and want a different area, or don’t want to crop the image, click Cancel.
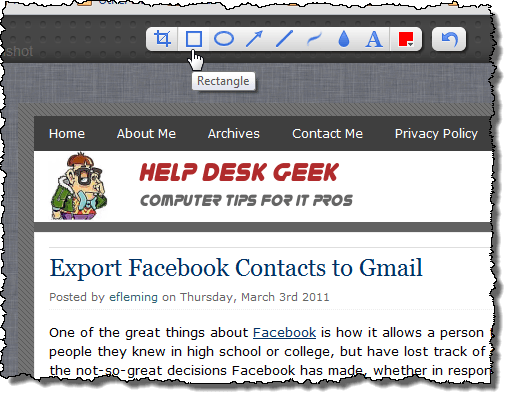
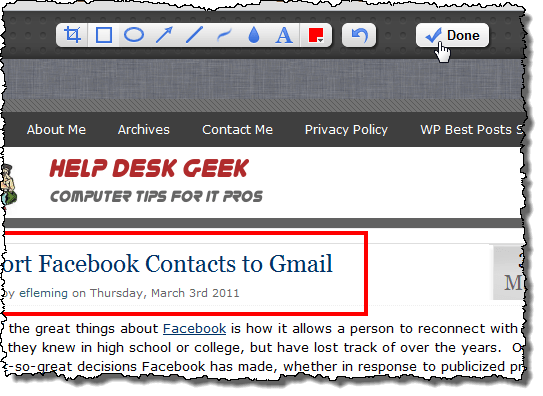
You can also add annotations (shapes, arrows, text, etc.) to your cropped screenshot, using the buttons on the Awesome Screenshot toolbar.
Once you have cropped and annotated your screenshot, click Done to finalize it.
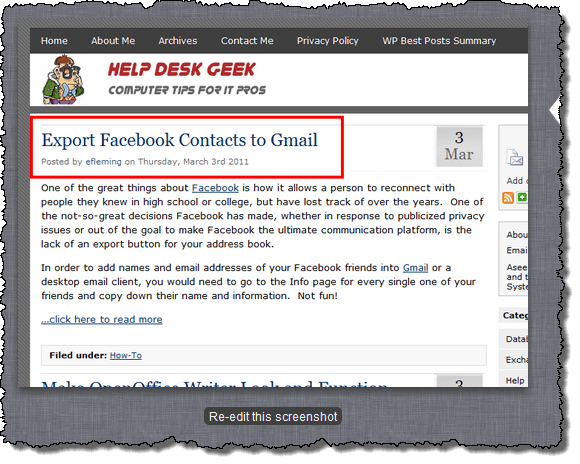
A new screen displays on the same Annotate Your Screenshot tab, showing your edited screenshot on the left. If you want to change your screenshot again, click Re-edit this screenshot below the screenshot.
You can undo your previous actions by clicking the Undo button on the Awesome Screenshot toolbar, even after you click Done and then click Re-edit this screenshot.
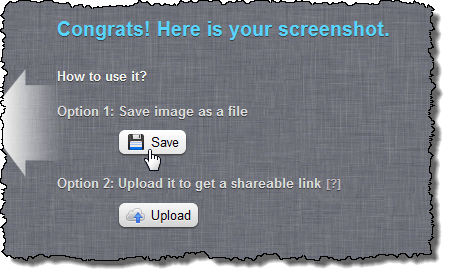
To save your screenshot, click the Save button under Option 1 on the right side of the Annotate Your Screenshot tab.
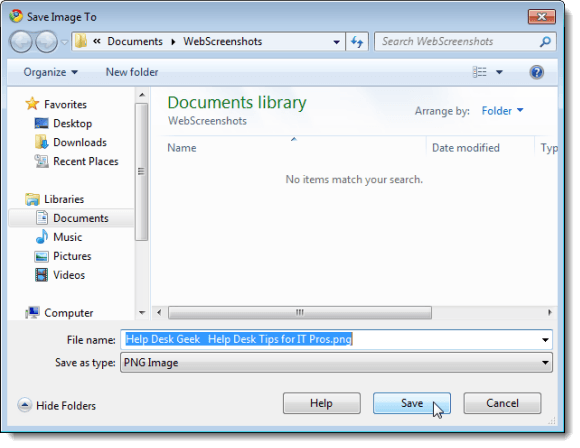
The Save Image To dialog box displays. Navigate to the folder in which you want to save your screenshot. A default name for the screenshot file is automatically entered into the File name edit box. Change the filename as desired, and select a different type for the file from the Save as type drop-down list, if desired. Click Save.
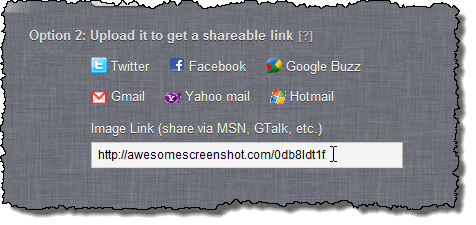
If you want to share your screenshot with family or friends, click the Upload button under Option 2, as pictured previously. Your screenshot is uploaded to the awesomescreenshot.com website and a link to your image displays in an edit box under Option 2. Select the text for the link and paste it into an email or on a social networking site to share with friends or otherwise save it to access your screenshot in the future.
When you are done editing, saving, and sharing the current screenshot, click the close (x) button on the Annotate Your Screenshot tab to close it.
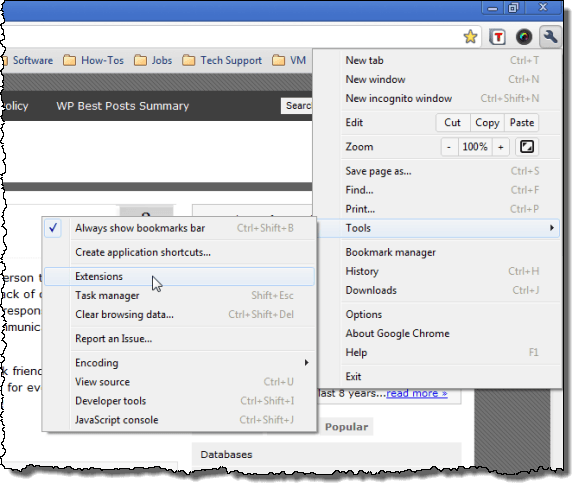
There are a few options you can set for Awesome Screenshot. To access these options, click the wrench button in the upper, right corner of the Chrome window. Select Tools | Extensions from the drop-down menu.
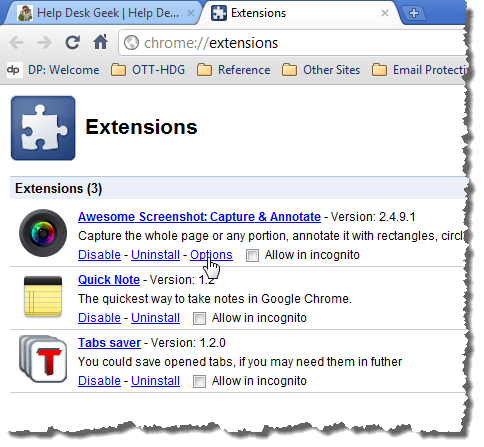
A new tab opens, titled Extensions, listing all the extensions installed in Google Chrome. If an extension has options you can set, there is an Options link under the description of the extension. Click the Options link for Awesome Screenshot.
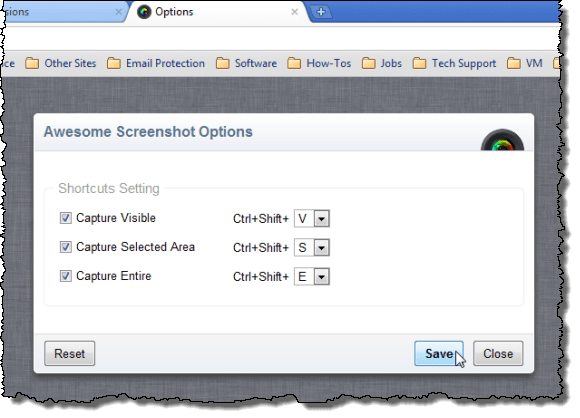
Another tab opens, titled Options, displaying the options available for Awesome Screenshot. The options available allow you to specify keyboard shortcuts for each of the options available on the Awesome Screenshot drop-down menu.
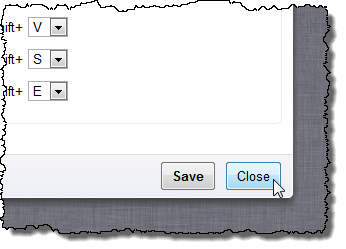
Select the check boxes for the shortcuts you want to turn on (the option is on when there is a check mark in the check box). The keyboard shortcuts all begin with Ctrl + Shift, which cannot be changed. However, you can specify the letters to use for the shortcuts. Select the desired letters from the drop-down lists. Click Save to save your changes.
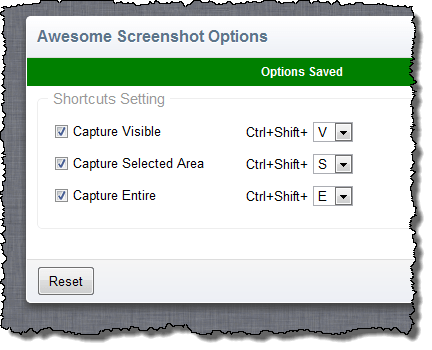
A message displays saying “Options Saved.”
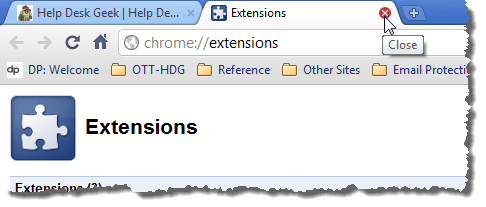
To close the Options tab, click the Close button. You can also click the Close (x) button on the Options tab, just like you would close any other tab.
To close the Extensions tab, click the Close (x) button on the tab.
Awesome Screenshot can be used for many purposes. You can use to document how to do something on the internet, show someone a cool website you found using the Upload feature, or take a screenshot of an online receipt for a purchase you made.




No comments:
Post a Comment