There are all kinds of software programs out there, both free and not free, that allow you to encrypt your files. However, Windows XP has native support for compressing and decompressing files and for opening these compressed files without need of extra software.
You can also password protect those files directly in Windows XP. The .zip files are treated as normal folders, allowing you to add files by dragging and dropping or to copy files from the .zip file.
To create a compressed, protected folder, find a file you want to add to a compressed folder. Right-click on the file and select Send To | Compressed (zipped) Folder from the popup menu.
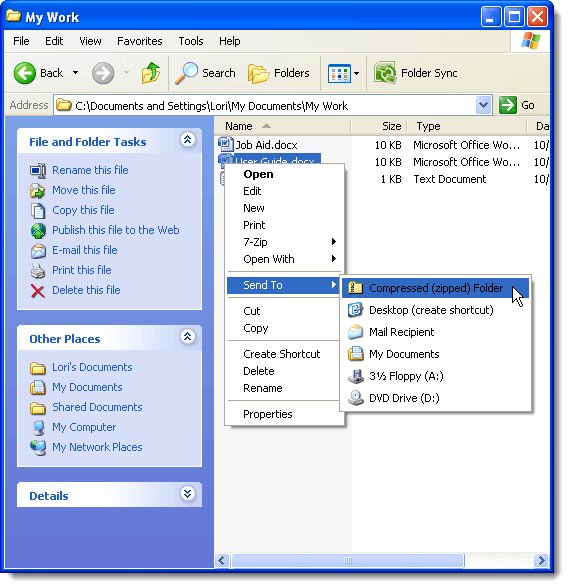
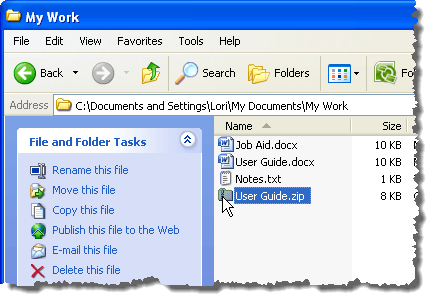
A compressed folder is created with the same name as the selected file. You can change the name of the .zip file, if desired.
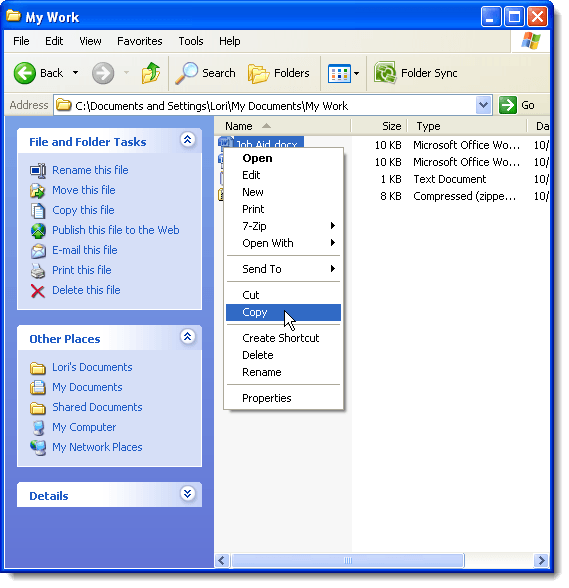
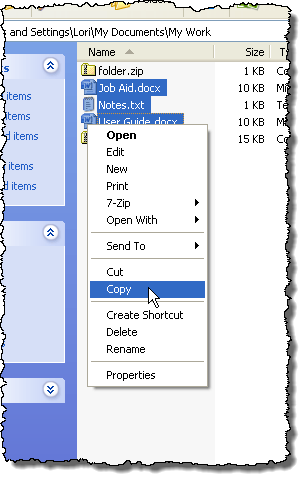
To add a file to the compressed folder, right-click on the desired file and select Copy from the popup menu.
NOTE: If you want to add more than one file to the compressed folder, you can select multiple files and then right-click on the selected files and select Copy.
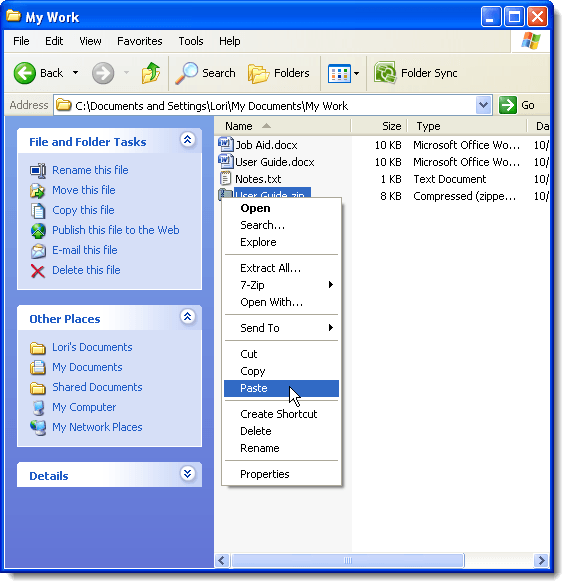
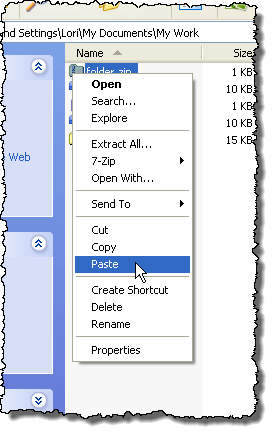
To add the copied file to the compressed folder, right-click on the compressed .zip file and select Paste from the popup menu.
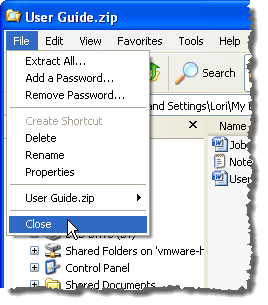
To apply a password to the compressed folder, you must first open it. To do this, right-click on the .zip file and select Explore from the popup menu.
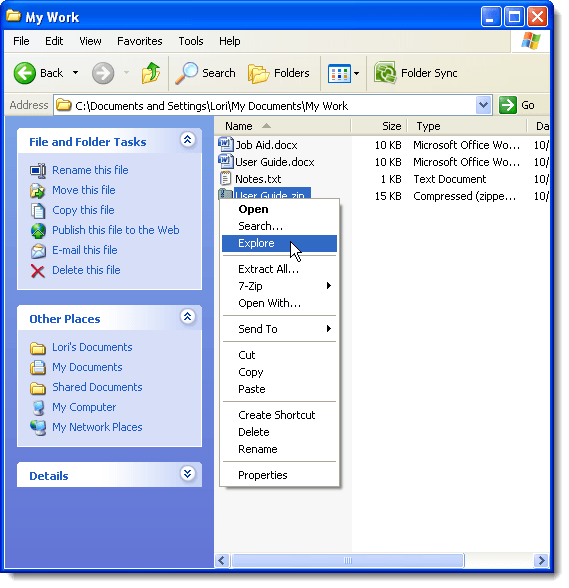
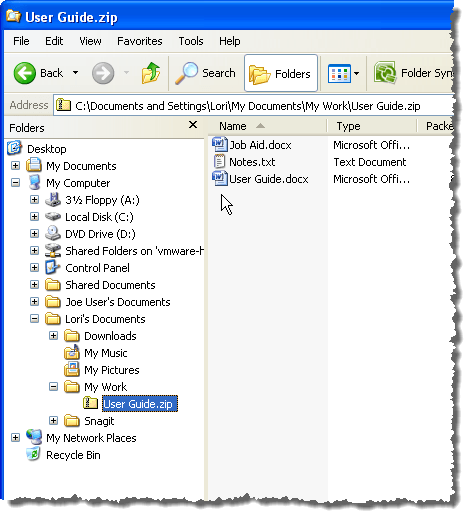
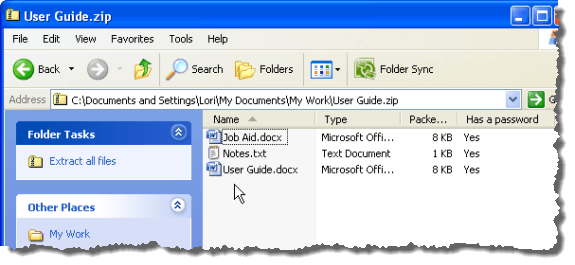
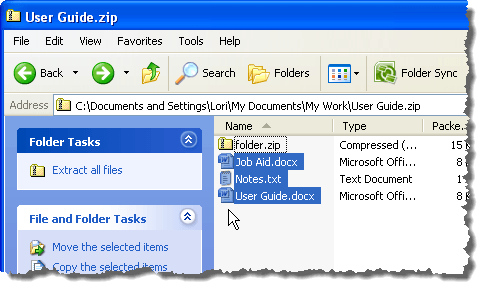
An Explorer windows opens showing you the contents of the .zip file.
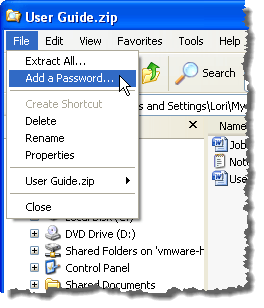
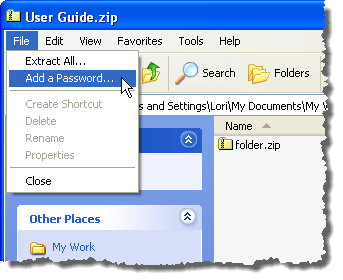
To apply a password to the compressed folder, select Add a Password from the File menu.
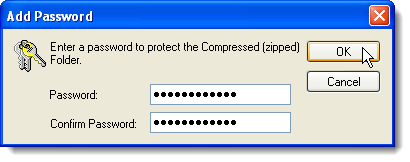
On the Add Password dialog box, enter the desired password in the Password edit box and again in the Confirm Password edit box. Click OK.

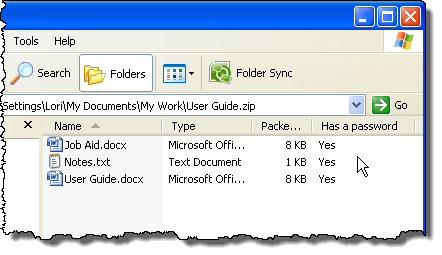
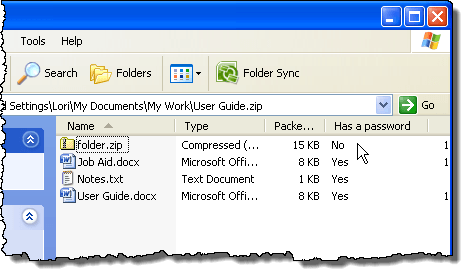
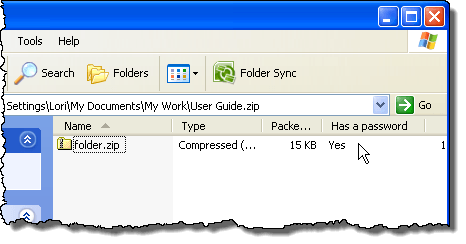
Notice that all the files in the compressed folder read Yes in the Has a password column.
To close the Explorer window, select Close from the File menu.
You probably noticed that the filenames in your password-protected, compressed folder are visible even though the files themselves cannot be opened without entering the password.
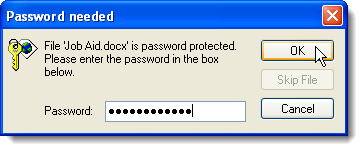
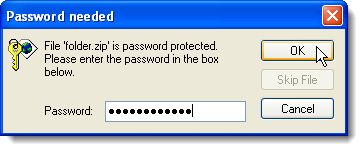
The following dialog box displays when you try to open a file in the password-protected, compressed folder. Enter your password and click OK to open the file.
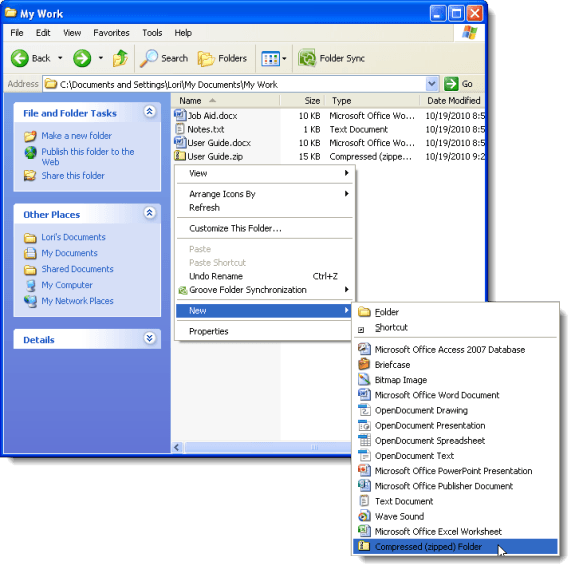
To hide the filenames, you need to create another secondary, compressed folder containing the files you want to protect. It is not necessary to password-protect this secondary, compressed folder. To do this, navigate to the folder containing the primary, password-protected, compressed folder. Right-click in this folder and select New | Compressed (zipped) Folder from the popup menu.
Select the files you want to put in the secondary, compressed folder. Right-click on the selected files and select Copy from the popup menu.
To copy the selected files into the secondary, compressed folder, right-click on the secondary, compressed folder and select Paste from the popup menu.
NOTE: Any subsequent files added to the compressed, protected folder will not be password-protected. To password protect subsequent files, the password needs to be removed and added again.
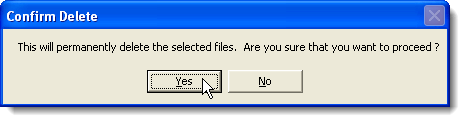
In this example, there is a way to avoid removing the password before adding a password so the secondary, compressed folder is protected. Select the files in the primary, compressed folder (but not the secondary, compressed folder) and delete them. You can either send them to the recycle bin or permanently delete them.
The following is the confirmation dialog box you see if you permanently delete the files. Click Yes.
Now, to apply a password to the secondary, compressed folder, select Add a Password from the File menu.
On the Add Password dialog box, enter the desired password in both edit boxes and click OK.
Now, the secondary, compressed folder is password-protected and it cannot be opened without entering the password. This hides your filenames from view.
When you double-click on the secondary, compressed folder, the Password needed dialog box displays asking for your password. Enter it and click OK to open the .zip file and access your files.
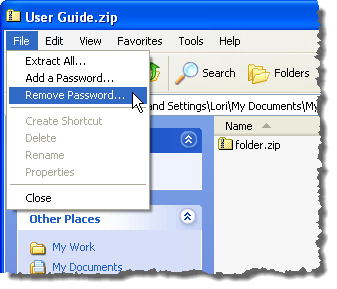
If you want to remove the password from your primary, compressed folder, open the .zip file as described earlier in this post. Select Remove Password from the File menu.
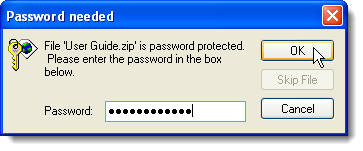
Enter your password in the edit box on the Password needed dialog box and click OK.
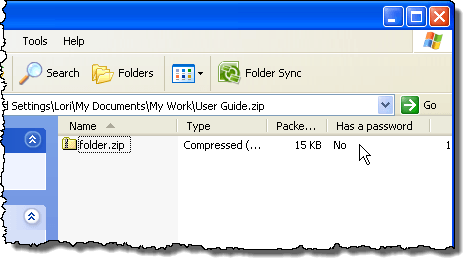
The Has a password column displays No for the secondary, compressed folder, indicating the password has been removed. Now, you can open the secondary, compressed folder without entering a password.
One drawback we found with creating an secondary, compressed folder containing your files to hide the filenames, is that we couldn’t find a way to copy other files into the secondary, compressed folder after it was created.
We had to create another compressed folder containing the original files and the new file(s) and copy that into the primary, compressed, protected folder. Then, you can delete the previous secondary, compressed folder, whether or not it is password-protected.

No comments:
Post a Comment