The Quick Launch Bar in Windows 7 is not displayed by default, but it can make a handy program launcher. This post shows you how to enable and disable the Quick Launch Bar and customize it by moving it and changing the size of the icons. We also show you how to quickly open the Quick Launch folder so you can easily add shortcuts to the Quick Launch Bar.
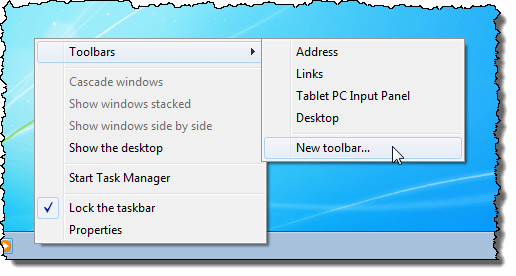
To add the Quick Launch Bar to the Windows 7 Taskbar, right-click on an empty portion of the Taskbar and select Toolbars | New toolbar from the popup menu.
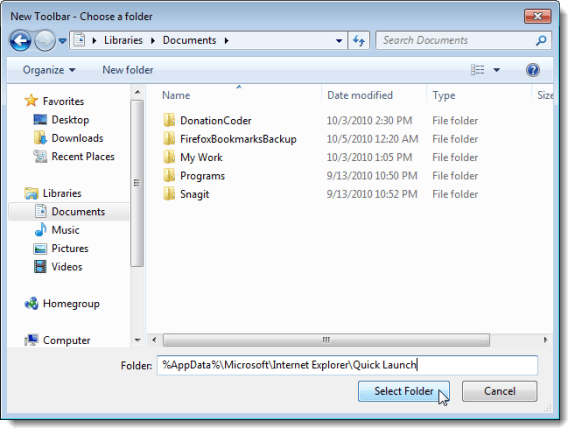
The New Toolbar – Choose a folder dialog box displays. Enter the following path in the Folder edit box:
%AppData%\Microsoft\Internet Explorer\Quick Launch
Click Select Folder.
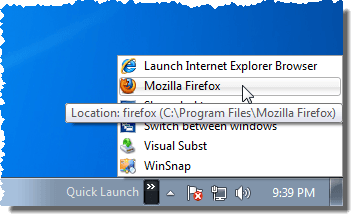
The Quick Launch Bar is added to the right side of the Taskbar. Click the double-arrow button to access the shortcuts.
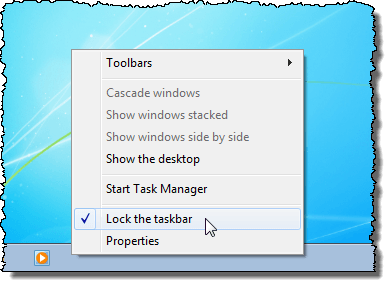
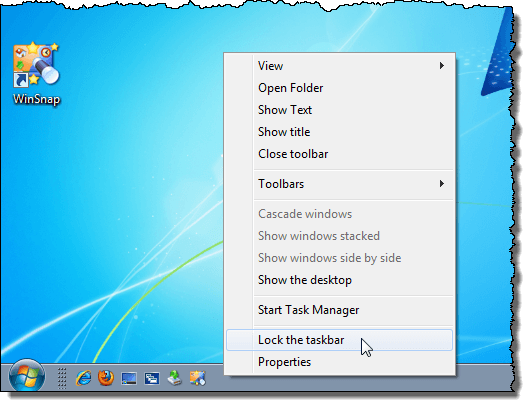
Before you customize the Quick Launch Bar, you must unlock the Taskbar. To do this, right-click on an empty portion of the Taskbar and select Lock the taskbar from the popup menu so there is no check mark next to the option.
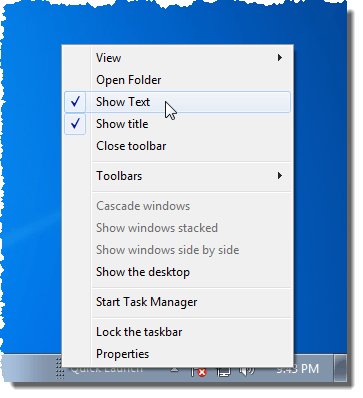
To make the Quick Launch Bar look and behave like a toolbar, right-click on the dotted border to the left of the Quick Launch Bar. Select Show Text and Show title options from the popup menu so neither one is checked. The Show Text option displays text next to each shortcut on the Quick Launch Bar. The Show title option displays the title “Quick Launch” on the Taskbar.
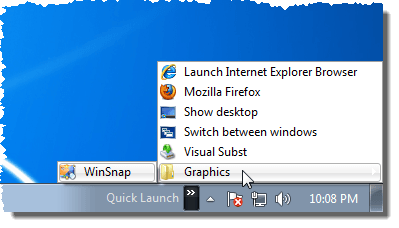
Click and drag the dotted border on the Quick Launch Bar to the left to expand it. This turns the Quick Launch Bar into a toolbar, as shown below.
If you want bigger icons on the Quick Launch Bar, right-click on the dotted border on the Quick Launch Bar and select View | Large Icons from the popup menu.
![]()
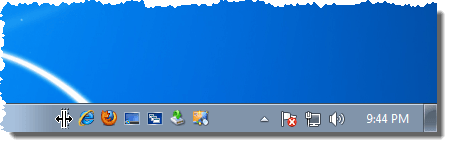
Here is a sample Quick Launch Bar converted to a toolbar with large icons.
![]()
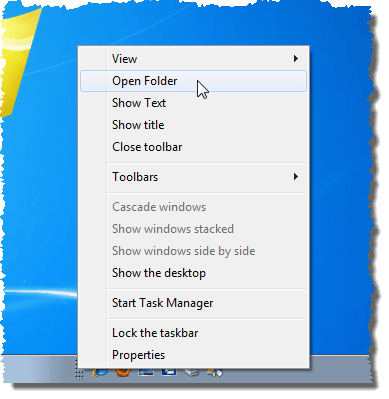
While the Taskbar is unlocked, you can open the folder containing the Quick Launch Bar shortcuts and add and remove shortcuts. To do this, right-click on the dotted border on the Quick Launch Bar and select Open Folder from the popup menu.
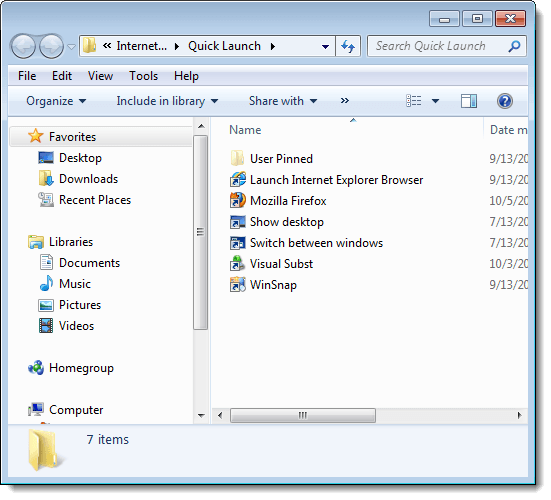
A Windows Explorer window opens to the Quick Launch folder. Add shortcuts to programs, folders, and files to this folder to add links to your Quick Launch Bar.
If you want to categorize the shortcuts on your Quick Launch Bar, you can add subfolders in the Quick Launch folder and put shortcuts inside the subfolders.
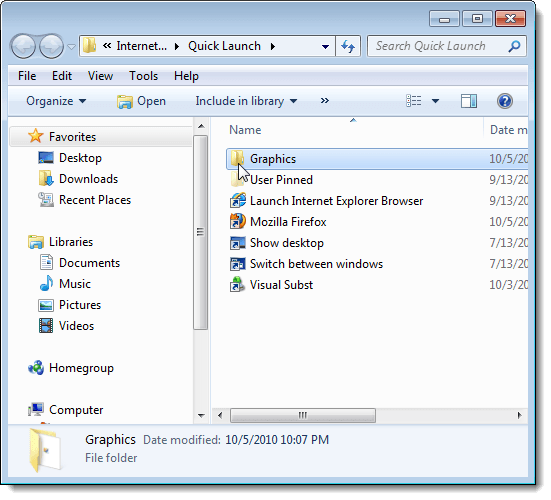
Then, if you don’t expand the Quick Launch Bar and leave it as a popup menu, the subfolders turn into submenus when you move the mouse over them. If you expand the Quick Launch Bar, clicking a folder on it opens that folder in Windows Explorer.
You can drag the Quick Launch Bar all the way to the left side of the Taskbar, next to the Start button. Note that, if you do this, any items pinned to your Taskbar are moved to the right side of the Taskbar next to system tray.
Once you have set up your Quick Launch Bar to your liking and moved it to where you want it, you should lock the Taskbar. Right-click on an empty portion of the Taskbar again and select Lock the taskbar from the popup menu so there is a check mark next to the option.
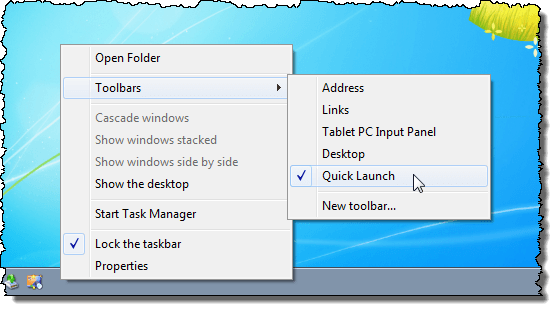
To remove the Quick Launch Bar from the Taskbar, right-click on the Taskbar and select Toolbars | Quick Launch from the popup menu.
If you remove the Quick Launch Bar, and then want to add it back, you will have to set it up again, unless you save it as part of your theme before removing it. See the Customize a Theme topic in the help for Windows 7 (the Help and Support button on the Start menu) for information about saving your theme.
When you remove the Quick Launch Bar and add it back, it gets added to the same default location every time you add it to the Taskbar. You also have to add it to the Taskbar using the procedure in this post. Once removed, it is no longer available on the Toolbars submenu.
NOTE: If you are using a 32-bit version of Windows 7, you may need to turn off User Account Control (UAC) if the Quick Launch Bar is disappearing every time you restart your computer. See our post, Windows 7 – How to configure UAC (User Account Control), for more information about turning off UAC.

No comments:
Post a Comment