You may use Firefox as your main web browser, but you may find that there are times you need to open web pages in other browsers. Generally, to do this, you must open the other browser and then copy and paste the link into the address bar in the other browser. You can avoid this time-consuming method, by installing the Browser View Plus add-on in Firefox. This add-on allows you to open web pages in other browsers from within Firefox.
This two-part series of posts shows you how to install and use the Browser View Plus Firefox extension to easily open web pages and links in external browsers.
NOTE: We tried installing Browser View Plus in Firefox running in Windows 7, and found it didn’t work. We installed and tested it in Windows XP and Windows Vista, using the latest version of Firefox, and it worked fine.
Install Browser View Plus
To install Browser View Plus, go to the following web page:
https://addons.mozilla.org/en-US/firefox/addon/10601/.
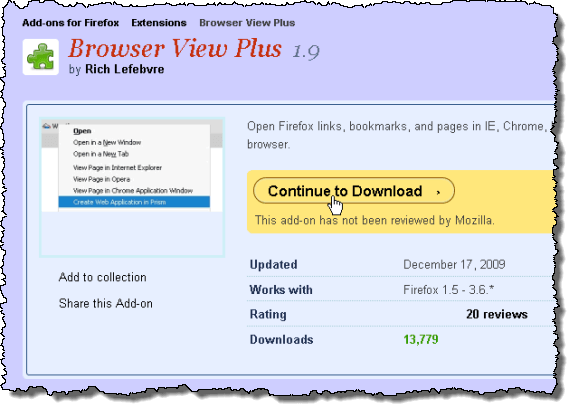
On the Browser View Plus add-on web page, click the Continue to Download button.
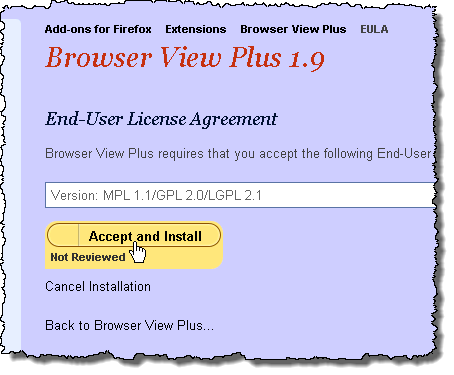
On the End-User License Agreement screen, click the Accept and Install button.
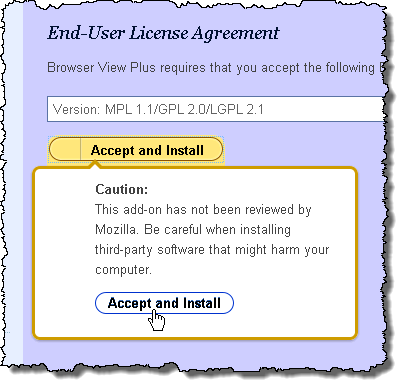
A Caution popup displays telling you that this add-on has not been reviewed by Mozilla. When we tried the add-on, it seemed to work fine (except in Windows 7) and didn’t cause any problems. Click Accept and Install on the popup to continue with the installation.
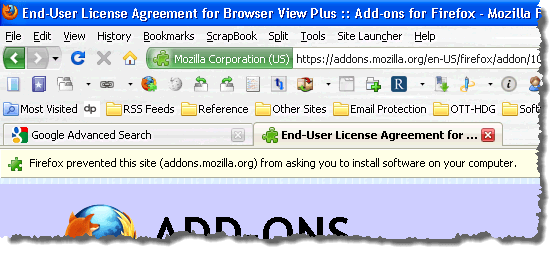
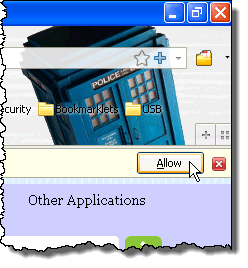
You may see a message display on a yellow bar right below the tabs telling you that Firefox prevented the site from asking you to install software on your computer.
If you see the above message, click the Allow button on the right side of the yellow bar to begin the installation.
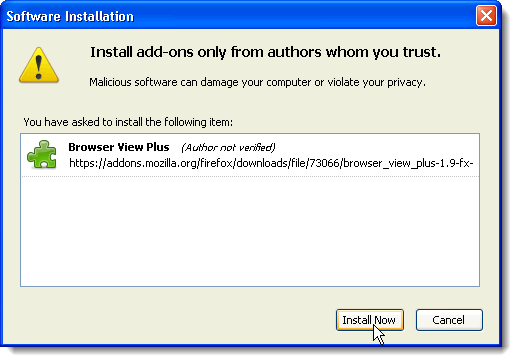
The Software Installation dialog box displays. There may be a countdown on the Install button, depending on your settings. If so, when it is done, click the Install Now button.
NOTE: See our post, Easily Tweak Firefox Configuration Settings Using a Graphical Interface, for information about turning off the add-ons installation delay, if desired.
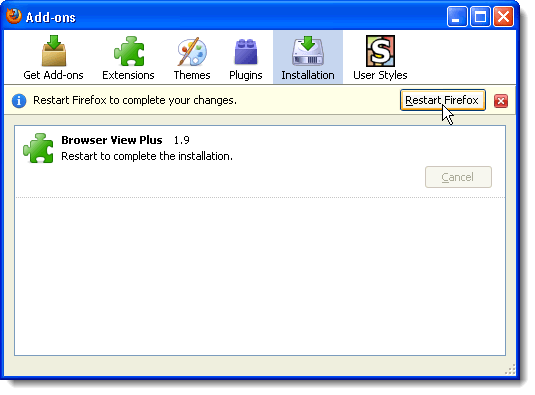
Once the installation if finished, the Add-ons dialog box displays again. You must restart Firefox for the changes to take effect. Click the Restart Firefox button.
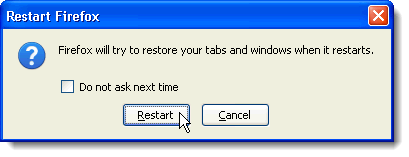
The Restart Firefox dialog box displays, telling you that Firefox will try to restore your tabs and windows when it restarts. If you don’t want to see this dialog box every time you restart Firefox, select the Do not ask next time check box so there is a check mark in the box. Click Restart.
Access Browser View Plus Options
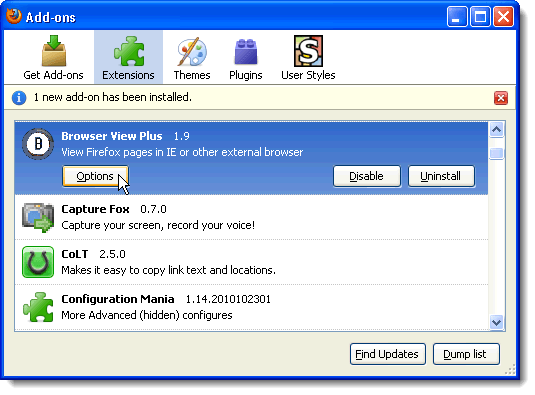
When Firefox reopens, the Add-ons dialog box may automatically display again. If it doesn’t, select Add-ons from the Tools menu to open it. The first thing to do with Browser View Plus is to set the options. Find Browser View Plus in the list on the Extensions screen and select it. Click the Options button.
Add External Browsers to the Context Menus
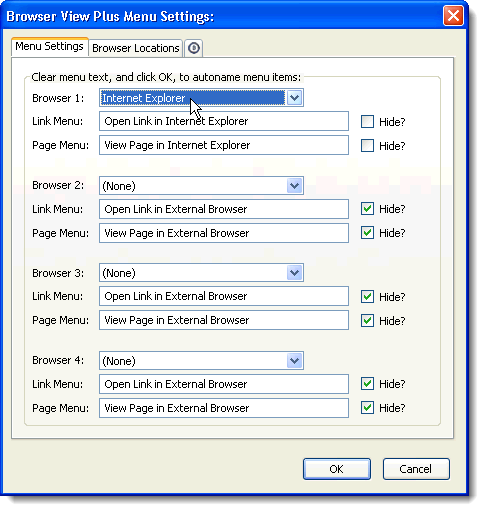
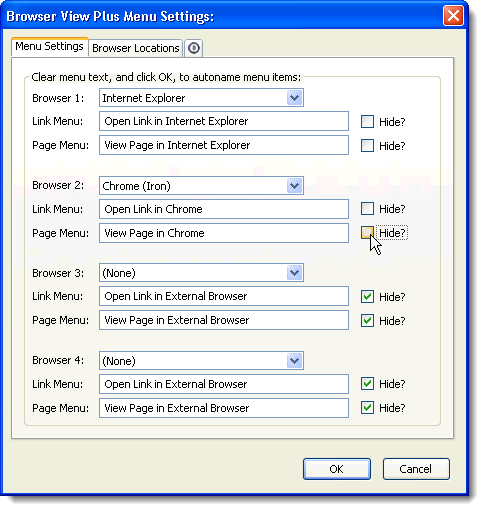
The Browser View Plus Menu Settings dialog box displays. You can specify up to four external browsers to be available on the Link Menu and/or the Page Menu.
The Link Menu displays when you right-click on a link on a web page. You can select an external browser from the Link Menu to open the selected link in that browser.
The Page Menu displays when you right-click on part of a web page that is not a link. Selecting an external browser from the Page Menu opens the currently open web page in that browser.
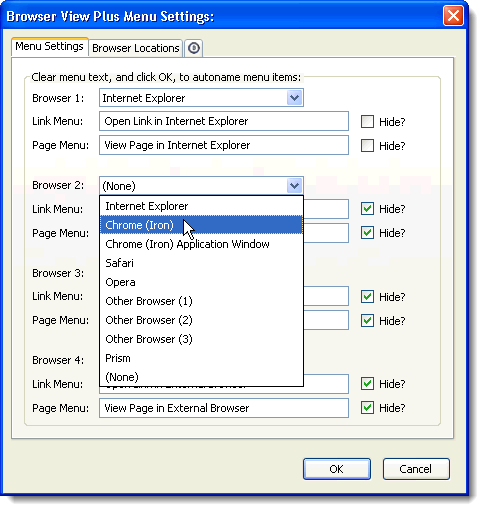
Select the browser you want to add to the menu from the Browser drop down list (1 – 4). For this example, we added Chrome as the second browser in the list, so we selected Chrome (Iron) from the Browser 2 drop-down list.
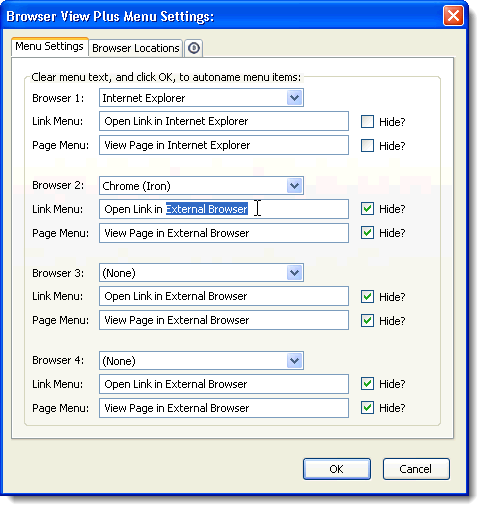
Change the Link Menu text and the Page Menu text to reflect the chosen external browser.
To have the selected external browser show up on the Link Menu when you right-click on links on a web page, select the Hide check box to the right of the Link Menu edit box so there is NO check mark in the box. Do the same for Page Menu if you want to be able to open the current web page in the selected external browser.
Wrap Up
This was the first post in a two-part series about installing and using the Browser View Plus Firefox extension to easily open web pages and links in external browsers.
In this post we covered installing Browser View Plus and adding external browsers to the context menus for links and pages.
Stay tuned for Part II, where we will cover specifying the location of a custom browser and adding that custom browser to the context menus for links and pages, defining additional buttons, using the new context menu options to open a link in an external browser, and adding the Browser View Plus buttons to the Firefox toolbar.

No comments:
Post a Comment