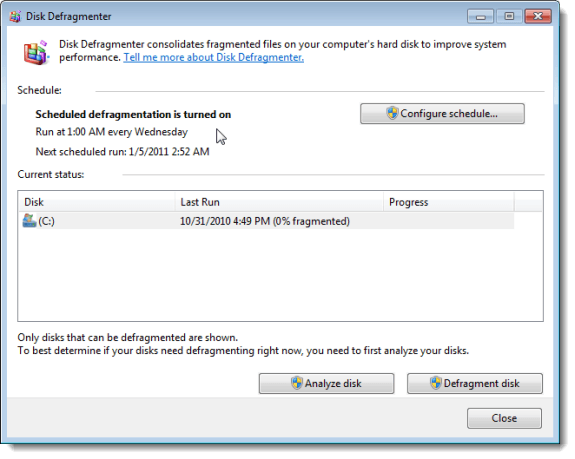
Defragmenting your hard drive makes sure that the data on the hard disk is in contiguous order. This provides easier and quicker access to files and programs. Windows 7 and Windows Vista are both set to automatically defragment your hard drive on a weekly basis, by default, or on a schedule you can customize (see our post, Modify the Disk Defragmenter Schedule in Windows 7 and Windows Vista).
Windows XP does not automatically defrag your hard drive on a set schedule, but you can set it up to do so. First, we will show you how to access the Disk Defragmenter in Windows XP and some of its features. Then, we will show you how to run the Disk Defragmenter automatically on a schedule.
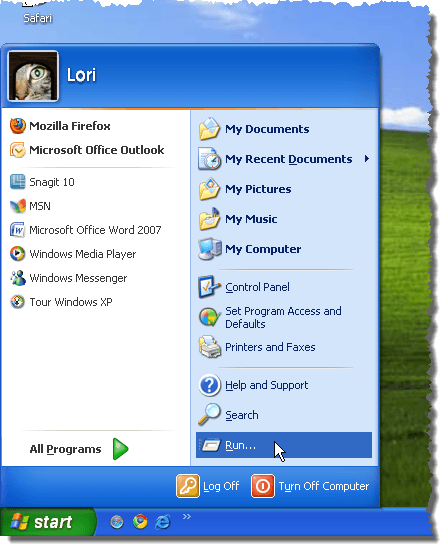
There are a couple of different ways of accessing the Disk Defragmenter in Windows XP. One way is to select Run from the Start menu.
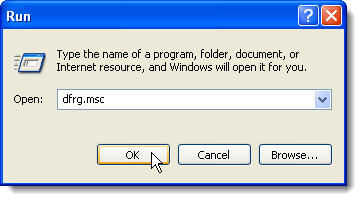
On the Run dialog box, enter “dfrg.msc” (without the quotes) in the Open edit box and click OK.
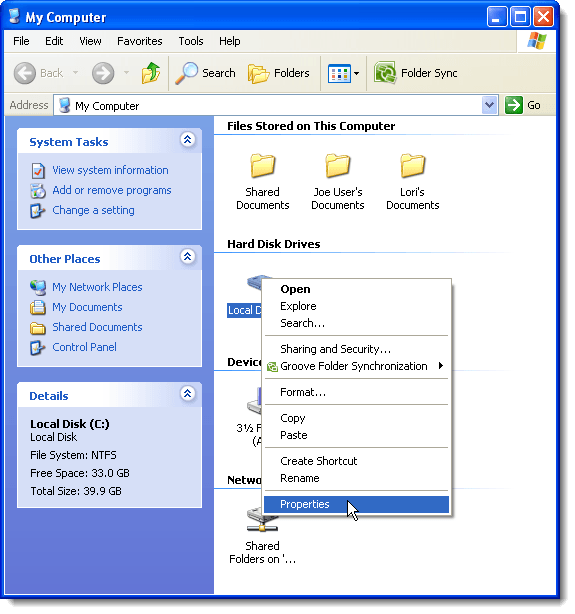
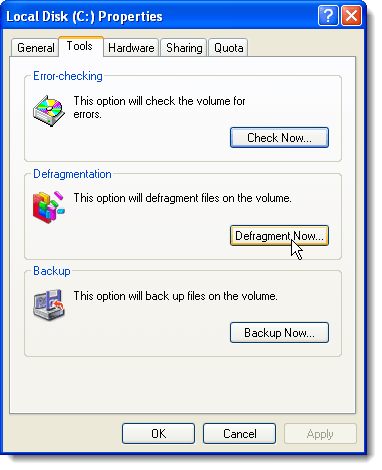
You can also access the Disk Defragmenter by opening My Computer, right-clicking on the hard drive you want to defragment and selecting Properties from the popup menu.
On the Properties dialog box, click the Tools tab and then click the Defragment Now button.
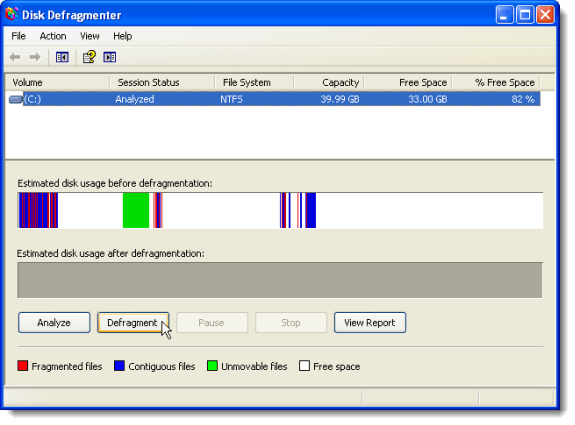
What’s nice about the Disk Defragmenter in Windows XP as opposed to the ones in Windows 7 and Windows Vista is you get a graphical interface in Windows XP showing you details about the disk usage before and after the defragmentation. This graphical interface is not available in Windows 7 or Windows Vista.
You can manually defragment a hard drive by selecting the desired hard drive from the list at the top of the Disk Defragmenter dialog box and clicking Defragment.
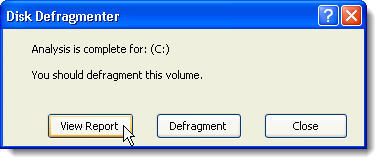
You can also analyze the selected hard drive by clicking the Analyze button. When the analysis is complete, a dialog box displays telling you whether you should defragment the hard drive. Click the View Report button to view more details.
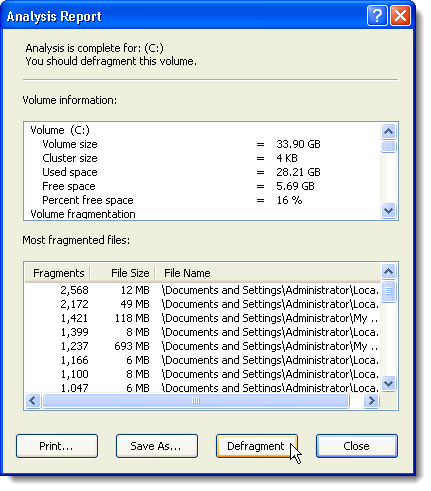
The Analysis Report dialog box displays, showing you information about the hard drive and the files on it that are the most fragmented. To defragment the hard drive, click Defragment. You can also click Save As to save the results of the analysis as a text file or click Print to print the results. Click Close to close the dialog box.
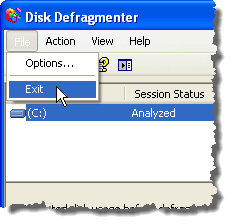
To close the Disk Defragmenter, select Exit from the File menu.
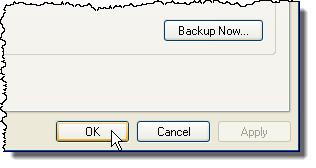
If you accessed the Disk Defragmenter from the Properties dialog box for a specific hard drive, click OK to close the Properties dialog box.
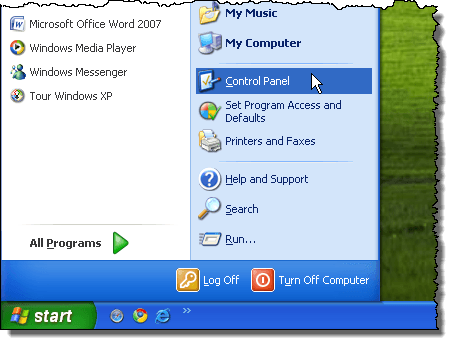
Now, we will show you how to set up the Disk Defragmenter to run automatically on a custom schedule. Select Control Panel from the Start menu.
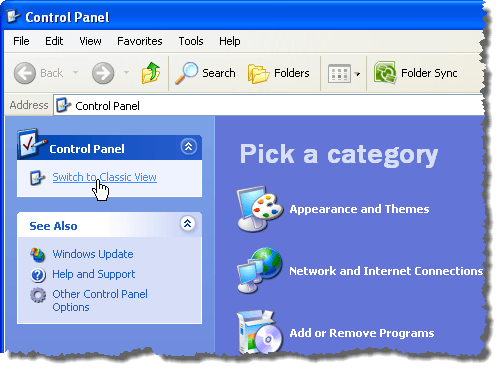
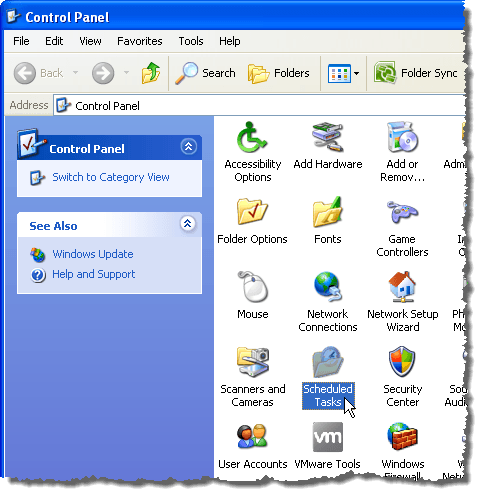
On the Control Panel, click the Switch to Classic View link, if the Category View is active.
Double-click the Scheduled Tasks item.
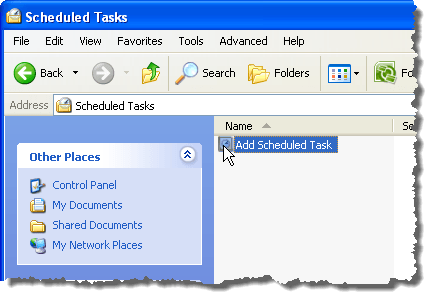
On the Scheduled Tasks dialog box, double-click the Add Scheduled Task item.
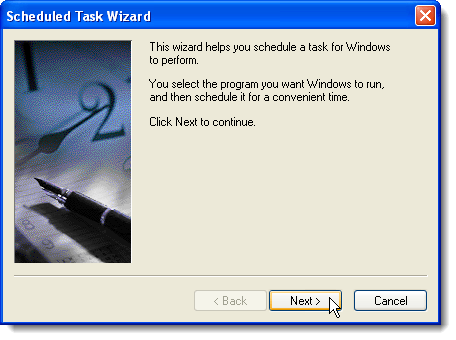
The Scheduled Task Wizard displays. Click Next.
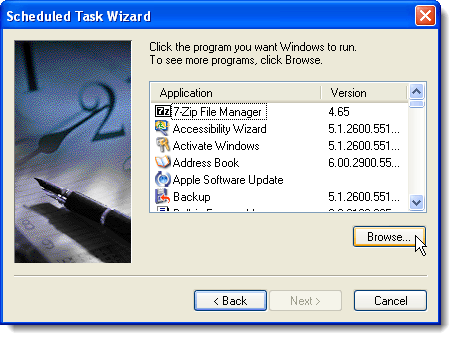
A list of applications you can automatically run displays. Click Browse.
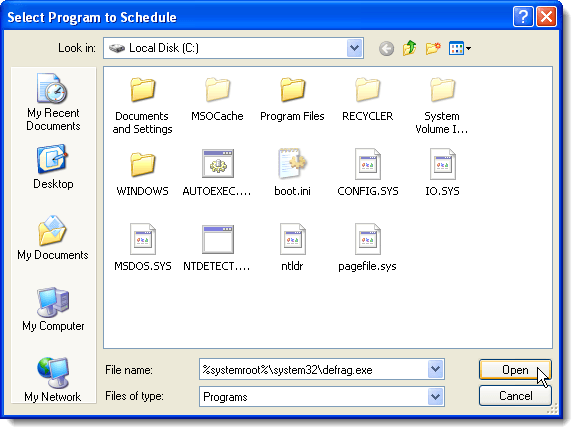
The Select Program to Schedule dialog box displays. Enter the following line, including the percent signs, in the File name edit box and click Open.
%systemroot%\system32\defrag.exe
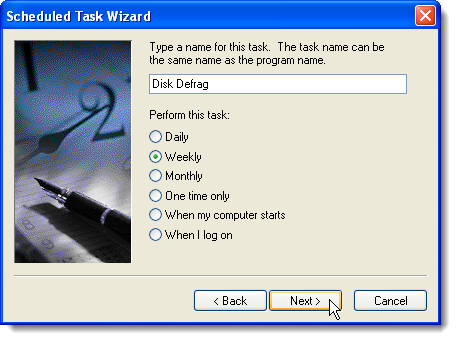
The next screen in the Scheduled Task Wizard displays. Enter a name for the task in the edit box. Select how often to perform the defragment task from the list of radio buttons under Perform this task. Click Next.
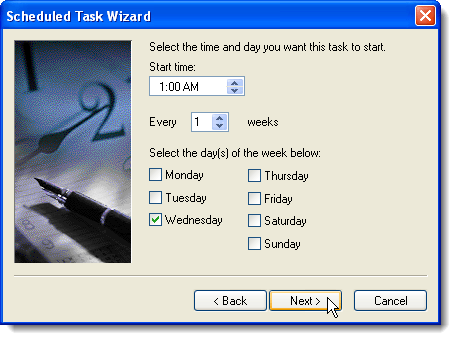
If you selected Daily, Weekly, Monthly, or One time only, the next screen allows you to specify the details about when to run the task. For example, if you selected Weekly, the options pictured below are available. Click Next when you have finished selecting your options.
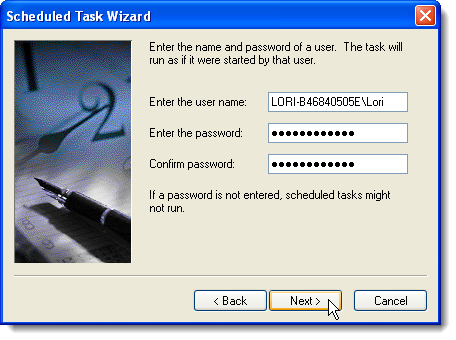
On the next screen, the currently logged in user is automatically entered in the Enter the user name edit box. You can change that to a different user name, if desired. Enter the password for the specified user in the Enter the password edit box and again in the Confirm password edit box. Click Next.
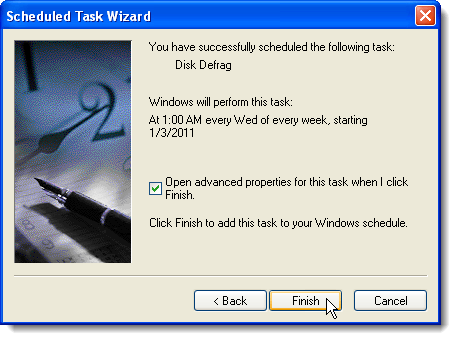
The next screen displays a summary of the scheduled task. To set more options for the task, select the Open advanced properties for this task when I click Finish check box. This allows you to specify a hard drive to be defragmented. Click Finish.
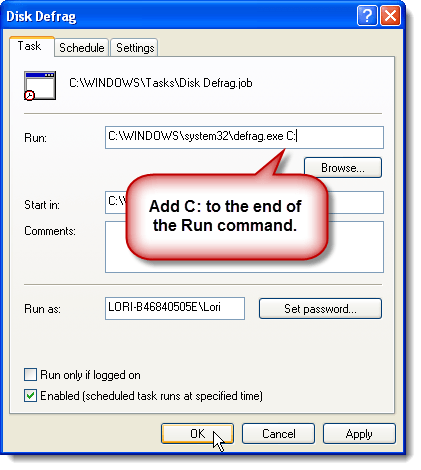
A dialog box displays with the name of the new task in the title bar. On the Task tab, add a space and the drive letter, such as “C:” (without the quotes) to the end of the line of text in the Run edit box.
If you want to only run the task if the specified user is logged into the computer, select the Run only if logged on check box. If this check box is not selected, the computer only has to be on for the task to run.
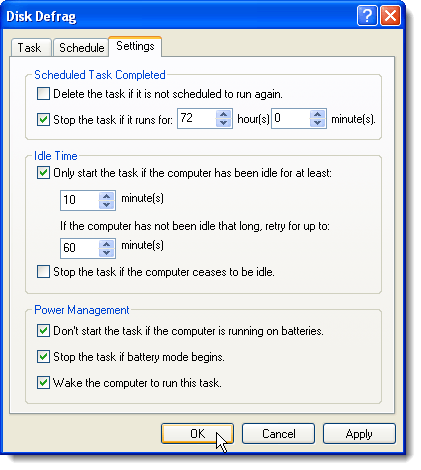
Click the Settings tab to customize additional settings for the new task. For example, you can specify to Only start the task if the computer has been idle for at least a certain number of minutes. This is useful if you happen to still be working on the computer when the time comes to run the task. The task won’t start if you are using the computer.
Click OK once you have changed the desired settings.
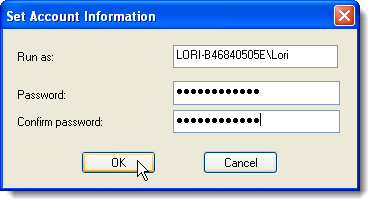
When you change settings for a task, you are asked for the password for the user account specified for the task. Enter the password in the Password edit box and again in the Confirm password edit box and click OK.
An icon for the newly created task displays on the Scheduled Tasks dialog box.
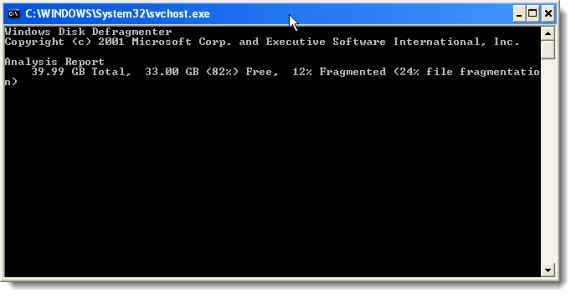
When the task runs, a command window opens displaying information produced by the task.
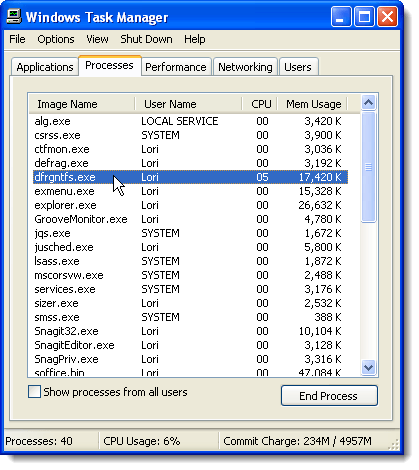
You won’t see the Disk Defragmenter graphical interface, but the Disk Defragmenter is running in the background. If you open up Task Manager (right-click on the Taskbar and select Task Manager), you’ll see the process running on the Processes tab.
Now your Windows XP machine will automatically defragment the local hard drive on a specified schedule just like it does in Vista and Windows 7.
You can also use a tool called pycron to schedule task to defragment your hard drive. See our post, Replacing the Windows Task Scheduler, for more information. The Command to be entered would be “%systemroot%\system32\defrag.exe” (without the quotes), the same as earlier in this post. The Parameter would be “C:” (again, without the quotes).

No comments:
Post a Comment