Windows 7 and Windows Vista both automatically configure the Disk Defragmenter to run once a week by default, usually at 1:00 am on Wednesday. You can easily modify this schedule. You can also defragment your disk manually in the Disk Defragmenter.
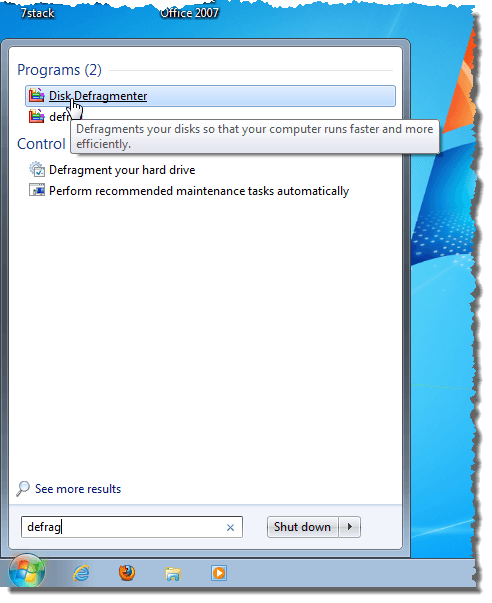
To open the Disk Defragmenter in Windows 7 or Windows Vista, enter “defrag” (without the quotes) in the Search box on the Start menu. Click on the Disk Defragmenter link that displays in the results.
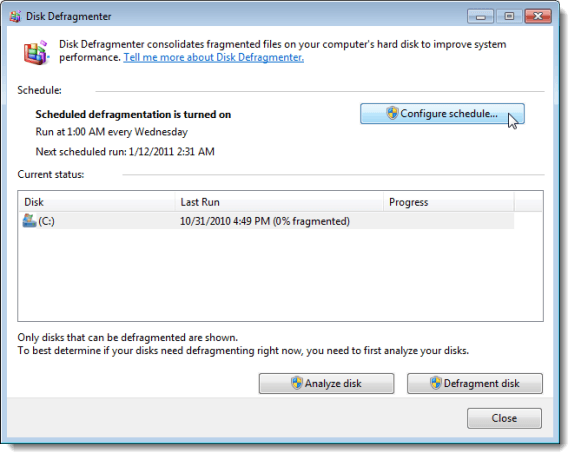
The following image shows the Disk Defragmenter in Windows 7. Available hard drives are listed in the Current status box. You can manually defragment a hard drive by selecting the desired hard drive in the Current status box and clicking the Defragment disk button. To change the schedule for automatically defragmenting one or more hard drives, click the Configure Schedule button.
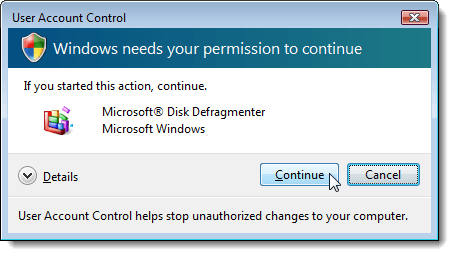
If you are using Windows Vista, the User Account Control dialog box displays before the Disk Defragmenter opens. Click Continue.
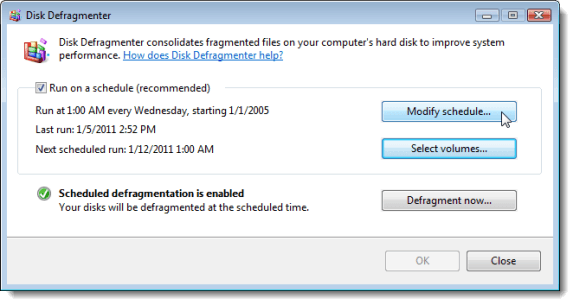
The following image shows the Disk Defragmenter in Windows Vista. You can manually defragment a hard drive by clicking the Defragment now button. If you do not want the Disk Defragmenter to run automatically on a schedule, select the Run on a schedule check box so there is NO check mark in the box. To change the schedule for automatically defragmenting one or more hard drives, click the Modify Schedule button.
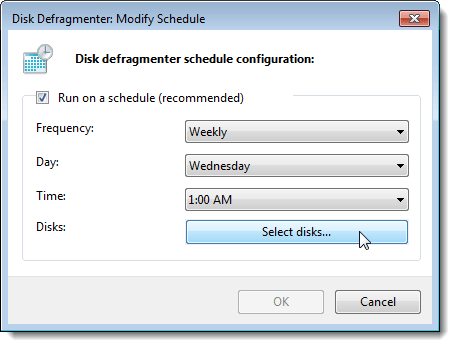
In Windows 7, the Modify Schedule dialog box displays, as pictured below, when you click the Configure Schedule button in the Disk Defragmenter. If you do not want the Disk Defragmenter to run automatically on a schedule, select the Run on a schedule check box so there is NO check mark in the box. Select the Frequency, Day, and Time from the drop-down lists. To select which hard drives to defragment, click the Select disks button.
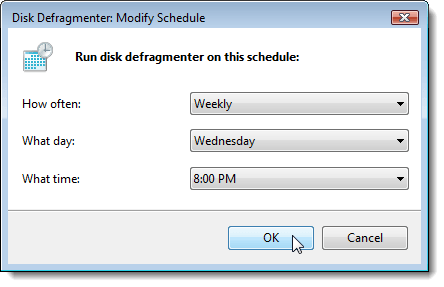
In Windows Vista, the Modify Schedule dialog box displays when you click the Modify Schedule button in the Disk Defragmenter. Select How often, What day, and What time from the drop-down lists. Click OK.
NOTE: Unlike Windows 7, you cannot select the disks to be defragmented from the Modify Schedule dialog box in Windows Vista. We will show you where to select disks in Windows Vista a little later in this post.
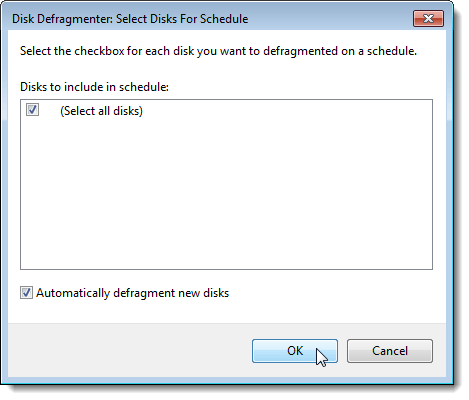
Clicking Select Disks on the Modify Schedule dialog box in Windows 7 displays the Select Disks For Schedule dialog box. Select disks to defragment in the Disks to include in schedule box. If only one disk is available, only the (Select all disks) option is available and is selected by default. If you want to automatically defragment any new disks you add to the computer without having to modify the schedule, select the Automatically defragment new disks check box. Click OK.
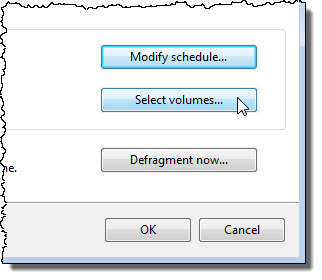
Selecting disks to defragment is done differently in Windows Vista. If you have at least Service Pack 1 installed, you can select which disks you want to automatically defragment on a schedule. To select disks to automatically defragment on a schedule, click OK on the Modify Schedule dialog box to close it (if it’s open) and click the Select volumes button on the Disk Defragmenter main dialog box.
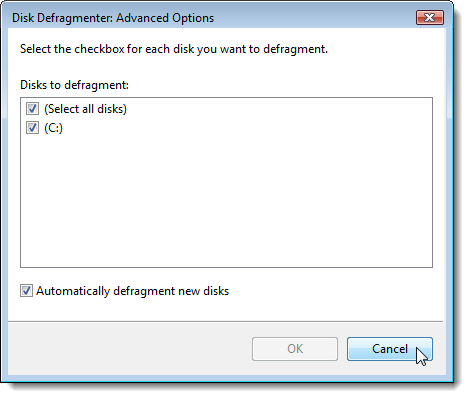
The Advanced Options dialog box in Windows Vista displays, allowing you to select disks to defragment. You can choose to defragment all available disks by selecting the (Select all disks) check box, or you can select specific disks. If you want to automatically defragment any new disks you add to the computer without having to modify the schedule, select the Automatically defragment new disks check box. Click OK if you have made any changes.
NOTE: If you don’t make any changes on the Advanced Options dialog box, the OK button is not available.
To close the Modify Schedule dialog box in either Windows 7 or Windows Vista, click OK.
To close the Disk Defragmenter in Windows 7, click Close.
To close the Disk Defragmenter in Windows Vista, click OK.
It is a good idea to use set up a schedule to automatically defragment your hard drive(s) to improve the performance of your computer, especially if you install and uninstall a lot of software and move around a lot of files. Try to schedule the Disk Defragmenter to run when you are not going to be using your computer.

No comments:
Post a Comment