In a recent article, we discussed how to insert action buttons into a PowerPoint presentation. Strangely, these actions buttons are found on the Shapes menu. In this article, we will look at adding and editing shapes in a PowerPoint presentation. As it turns out, you can manipulate the shapes on a PowerPoint slide to look just like you want them to look.
Adding Shapes to a PowerPoint Slide
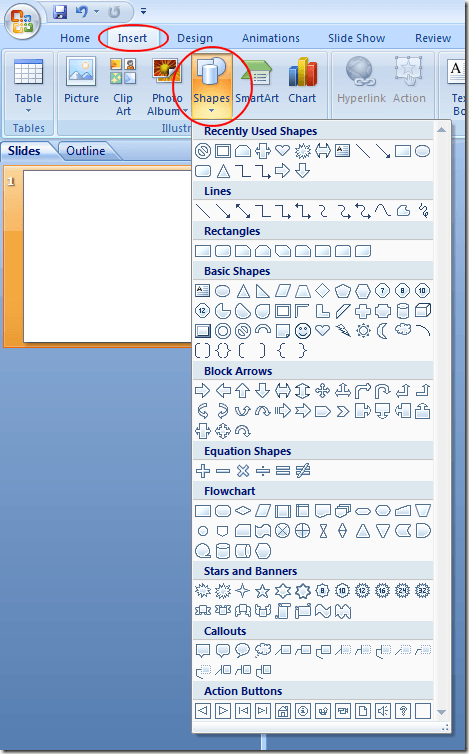
To add a shape to a PowerPoint slide, begin by clicking on the Insert tab on the Ribbon and locating a section of the Ribbon titled Illustrations. Click on the button labeled Shapes and a large menu will appear showing all of the shapes you can add to a PowerPoint slide. In total, there are over 100 shapes available.
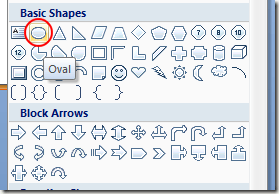
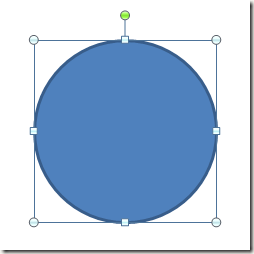
Suppose you want to add a circle shape to the current PowerPoint slide. Click on the Oval button on the Shapes menu located under Basic Shapes. Then, hold down the left mouse button and drag the mouse across the slide. When the oval is the approximate size you want, let go of the left mouse button. Don’t worry if the circle isn’t exactly the size you wanted or in the right place. You can edit the circle’s size, color, position, etc. after it is already on the slide.
While dragging the oval on the screen, you may have noticed that it was difficult to create an exact circle. If you hold down the CTRL key on your keyboard while you drag the mouse, you can lock the horizontal and vertical aspect of the shape to create a uniform shape. In other words, the length and width of the shape will remain constant so you can create a perfect circle with the oval tool.
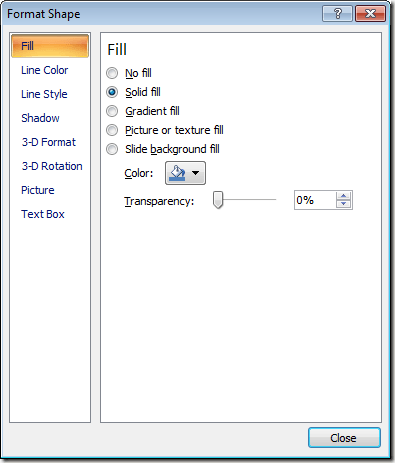
You can change the border color, border size, and fill color of the shape by right clicking on the circle and selecting Format Shape from the menu. The Format Shape window will open allowing you to edit many aspects of the shape.
Unlike other shapes in PowerPoint, you cannot drastically change the appearance of an oval or circle. However, you can edit other shapes to create some customized elements for your presentation.
Editing Shapes in PowerPoint
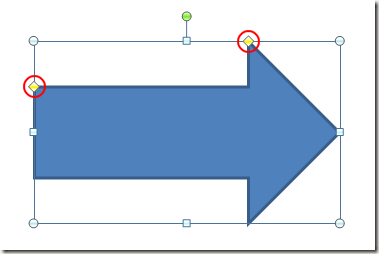
Using the same technique described above, add a Right Arrow to your slide. The Right Arrow shape is found on the Shapes menu under the section labeled Block Arrows. The arrow you just added to your slide is your standard right-pointing arrow. However, notice that there are two yellow diamonds on the shape. These two diamonds let you know that there are two aspects to this shape’s appearance that you can edit.
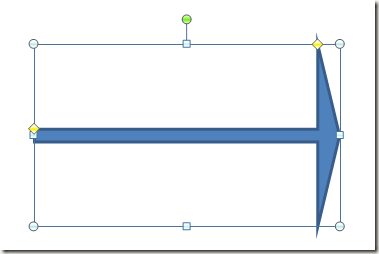
Click and hold the yellow diamond on the left of the Right Arrow shape and drag it downward a bit. Notice that this allows you to control the width of the arrow’s stem. Click and hold the yellow diamond at the top of the Right Arrow and drag it the right a bit. Notice that this allows you to control the size of the arrow’s pointer. By manipulating the yellow diamonds, you can dramatically change how the arrow is displayed on the slide.
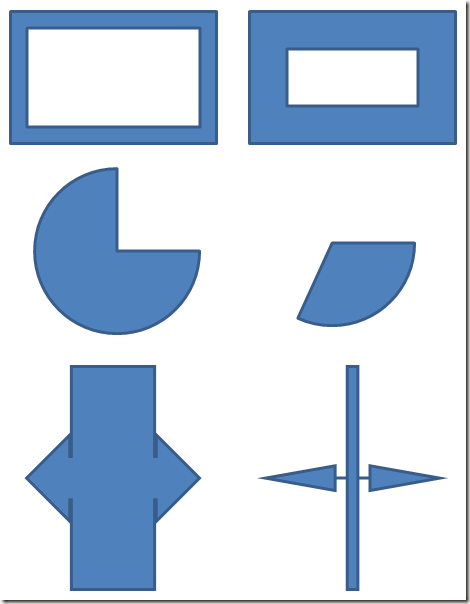
Although you cannot edit all of the shapes in PowerPoint this way, a number of shapes can be changed to suit your needs. In this way, you are not stuck trying to make your presentation fit the shapes; you can edit the shapes to fit your presentation. Take a look at the before and after examples below:
With a little bit of practice, you can make many of the shapes in PowerPoint look exactly like you want. In fact, you can even make your presentation stand out among the others that simply use the shapes as they are displayed on the screen by default. Experiment with editing shapes in PowerPoint to make your presentation’s message clearer and more visually appealing to your audience.

No comments:
Post a Comment